ENGLISH
SCREEN Menu
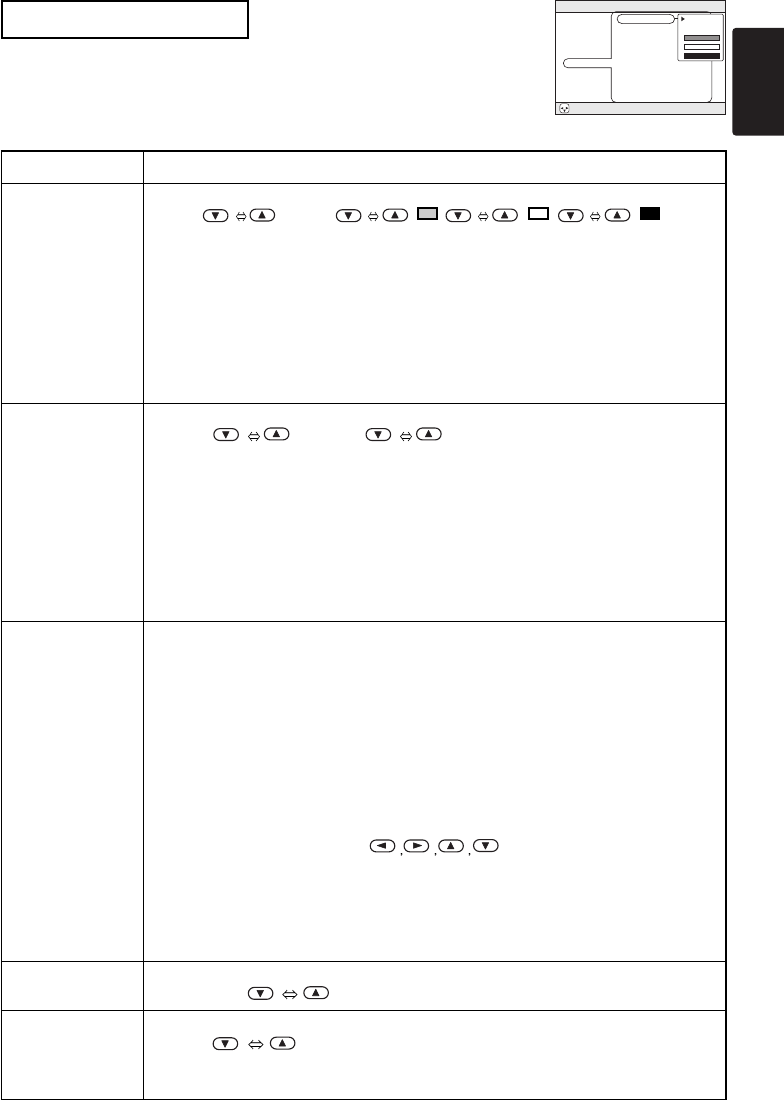
With the SCREEN menu, the five items shown in the Table below can be performed.
Please perform each operation in accordance with the instructions in the Table.
5
SCREEN Menu
Item Description
BLANK
Selection of BLANK Screen:
MyScreen ORIGINAL .. . . ..
The BLANK Screen may be voluntarily selected. The BLANK Screen is displayed when the screen
has been erased (i.e., made to vanish) by manipulating the BLANK button (please refer to the
“Temporarily Blanking the Screen” section of the separate booklet, Vol. 1 (Basic)).
MyScreen:
Using the MyScreen category (see this Table, below), one can register a desired screen
(or screens). At the time of factory shipment, this is set as a non-patterned (plain) blue color screen.
ORIGINAL:
Existing standard screens. Please make confirmation using the actual screen(s).
Option screens:
Various colored non-patterned (plain) screens displayed within the Menus.
• The MyScreen and the ORIGINAL Screen will each change to a non-patterned (plain) black color
screen several minutes after being displayed.
START UP
Selection of START UP Screen:
MyScreen ORIGINAL
TURN OFF
The START UP Screen may be voluntarily selected. The START UP Screen is displayed when
no signal has been inputted, or when spec signals are being inputted.
MyScreen:
Using the MyScreen category (see this Table, below), one can register a
desired screen (or screens). At the time of factory shipment, this is set as a non-patterned
(plain) blue color screen.
ORIGINAL:
Existing standard screens. Please make confirmation using the actual screen(s).
TURN OFF:
A non-patterned (plain) blue color screen.
•
The MyScreen and the ORIGINAL Screen will each change to the BLANK Screen several
minutes after being displayed.
MyScreen
Registration of MyScreen:
When this item is executed, the MyScreen Menu for registration of MyScreen for the BLANK Screen
and the START UP Screen is displayed. When operations are performed in accordance with this Menu,
one can “cut” and register desired screens from among the received images within the display.
1. After the “Do you start capturing this picture?” message has been displayed, pressing the ESC (or
RESET) button interrupts execution of the MyScreen. When the ENTER button is pressed, the
picture becomes static (no longer moves), and a frame for picture cutting, as well as the message
that follows below, appear. Please press the button when the screen you want to register is
currently being displayed.
2.
When the “Move the capture area as you want.” message has been displayed, pressing the ESC (or RESET)
button will eliminate the static state of the picture, and operations can be performed again from operation 1.
The frame can be moved using the
buttons. After designating the screen
you want to register, pressing the ENTER button will initiate screen registration. The registration
process takes approximately 1 minute to complete.
3. When the registration has been completed, the screen of the registered MyScreen, plus the
message, “MyScreen registration is finished,” will be displayed for several seconds, after which
the operation is terminated.
MyScreen Size
Selection of MyScreen display size:
x1 FULL
MyScreen Lock
Invalidation of MyScreen registration function:
TURN ON TURN OFF
When TURN ON is selected, the MyScreen category (see this Table, above) cannot be executed; in
this way, one can prohibit rewrites (“writeovers”) of the MyScreen.
Example : SCREEN Menu
(BLANK)
MENU
: SELECT
MAIN
PICTURE-1
PICTURE-2
INPUT
SCREEN
OPTION
BLANK
START UP
MyScreen
MyScreen Size
MyScreen Lock
MyScreen
ORIGNAL


