


10
9
1211
CHECKING REMOTE AND INDOOR
TEMPERATURES
The remote temperature information line is located on
the top of the main unit’s display.
The wave icon is located above the remote channel
number and indicates the reception status from the
remote sensor.
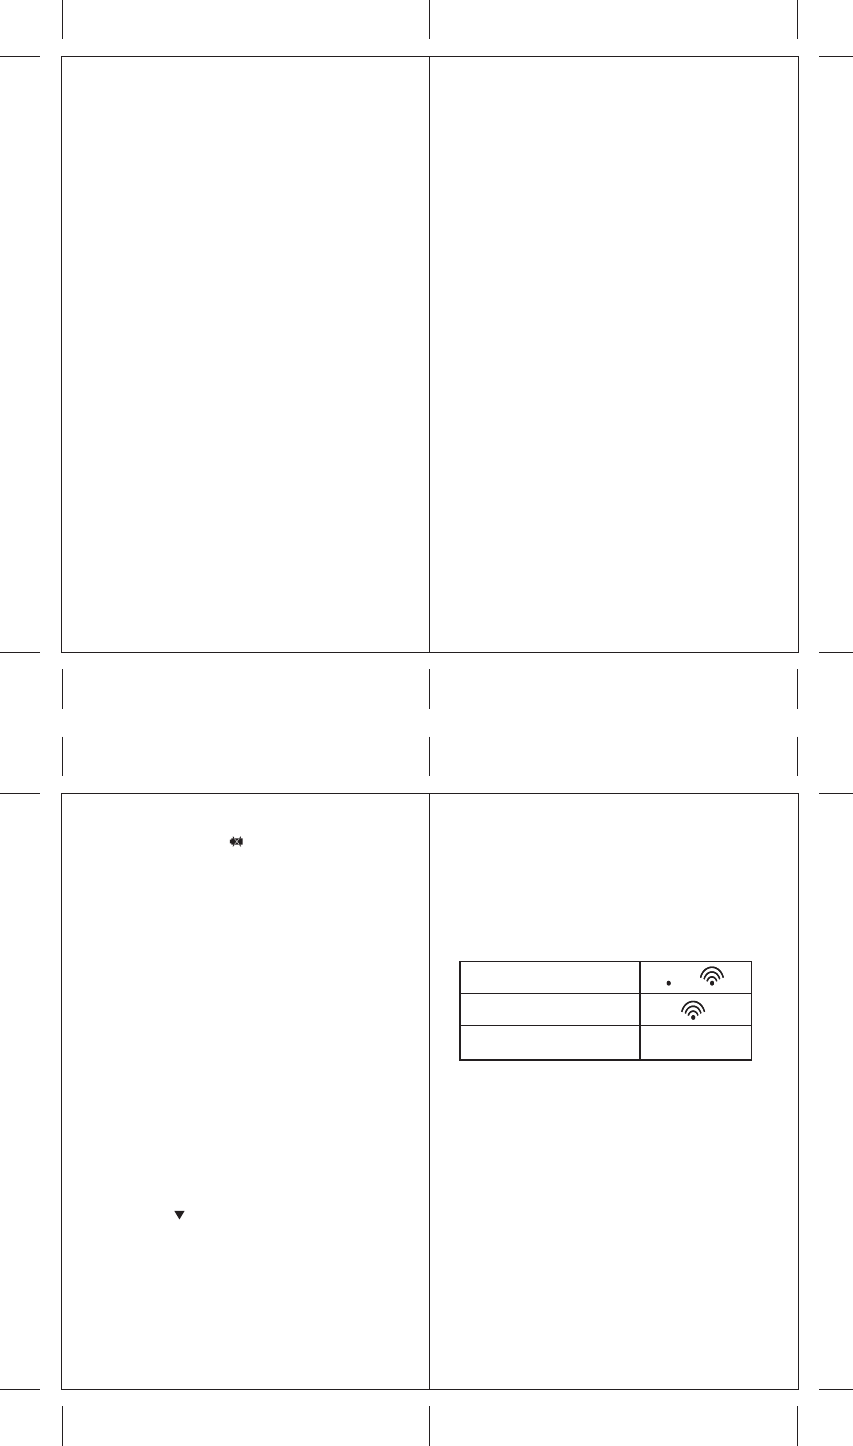
There are three remote status types:
The indoor temperature with the icon IN is located
below the remote temperature information line.
NOTE: If the indoor or remote temperature goes above
or below operating range stated in specifications, the
main unit’s display will show dashes “- - -”
MAXIMUM AND MINIMUM READINGS
The maximum and minimum record of the indoor and
remote temperatures will be automatically stored in the
memory of the main unit (receiver).
To display the minimum, maximum or the current
reading press MEMory button.
If no button is pressed for the next 15 seconds, the unit
will return to the current temperature display.
To clear the memory, press and hold MEMory button
for two seconds and all previously stored readings will
be erased.
NOTE: Batteries in the outdoor remote sensors may
have reduced voltage supply and a shorter effective
range at temperatures below freezing. We
recommend using lithium batteries below 32°F
(0°C).
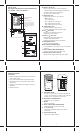
BATTERY INSTALLATION
REMOTE SENSOR
NOTE: Install the batteries; select the channel and
temperature in C° or F° before mounting the remote
sensor.
• Remove the screws from the battery compartment
with a small Phillips screwdriver.
• Select the desired channel. The switch is located in
the battery compartment. Channel 1 is the default
setting and typically selected if only one remote
sensor is being used.
• Install 2 “AA” size alkaline batteries (not included)
matching the polarities shown in the battery
compartment.
• Replace the battery compartment door and secure the
screws.
• Secure remote sensor in the desired location.
MAIN UNIT
• Open the battery compartment door.
• Install 2 batteries (UM-3 or “AA” size 1.5V) matching
the polarity as shown in the battery compartment.
• Replace the battery compartment door.
BEFORE YOU BEGIN
• The remote sensor can be placed indoors or
outdoors, the main unit must be placed indoors.
• We recommend using alkaline batteries for the
remote sensor and main unit when temperatures are
above 32°F (0°C). We recommend using AA lithium
batteries for the remote sensor when temperatures
are below 32°F (0°C).
• Avoid using rechargeable batteries. (Rechargeable
batteries cannot maintain correct power requirements).
• Insert batteries before first use, matching the polarity
in the battery compartment.
• ALWAYS install batteries in the remote sensor
before the main unit.
• Press RESET after each battery change with a paper
clip or similar tool.
• During an initial setup, place the main unit as close
as possible to the remote sensor.
• After reception is established (the remote temperature
will appear on the main unit’s display), position the
remote sensor and the main unit within the effective
transmission range of 100 feet (30 meters).
NOTE:
1.Avoid setting manually the time and date on the main
unit before the remote temperature is displayed.
2.The effective operating range may be influenced by
the surrounding building materials and how the receiver
and transmitter are positioned.
3.Place the remote sensor so that it faces the main unit
(receiver), minimizing obstructions such as doors,
walls, and furniture.
4. Though the remote sensors are weather-resistant,
they should be placed away from direct sunlight, rain
or snow.
LOW BATTERY WARNING
A low-battery indicator [ ] will appear on the indoor
or remote temperature reading line of the main unit
warning that the corresponding batteries need
replacement.
TABLE STAND
The main unit has a removable table stand that supports
it on the flat surface. Attach table stand to the bottom of
the main unit in the slots provided. The unit can also be
mounted on the wall using the recessed screw hole. The
table stand must be removed prior to mounting.
GETTING STARTED
After batteries are installed; the remote sensor will
transmit temperature readings at 45 second intervals.
The main unit may take up to two minutes to receive
the initial readings. Upon successful reception, remote
temperature will appear on the top line of the main
unit’s display. The main unit will automatically update
readings at 45-second intervals.
If no signals received from the remote sensor within
two minutes, dashes [- - -] will be displayed. Press and
hold DOWN ( ) button on the main unit for two
seconds to initiate another signal search.
The unit is in searching mode.
Temperature readings
securely registered.
No signals detected.
- - -