


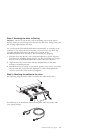


Step 4. Mounting the drive in the bay
Attention: Be sure to use the M3 x 5-mm mounting screws in the option
package when you are driving screws directly into the drive. Using screws that
are too long might damage the drive.
You can mount the DVD-RAM/DVD-R drive horizontally or vertically in the
computer. If you mount the drive vertically, you must secure any discs that
you place into the drive before the drive tray is closed, or the
DVD-RAM/DVD-R drive will not be able to read the disc properly.
1. Slide the drive into the bay. Your computer might have specific required
procedures for installing storage devices. For more information on storage
devices, refer to the documentation that comes with your computer.
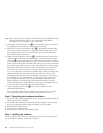
2. Align the drive-bay screw holes with the threaded holes in the drive
housing or mounting bracket.
3. Thread the screws in loosely to check their position. Two screws are usually
used on each side. Verify that the alignment is correct; then tighten the
screws to secure the drive. Do not overtighten.
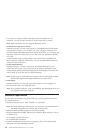
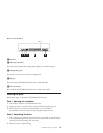
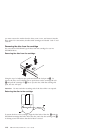
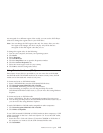
Step 5. Attaching the cables to the drive
The following diagram shows where to connect the cables to the drive.
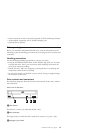
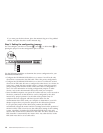
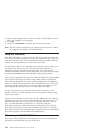
The following is an illustration of the internal audio cable that comes with
your option package.
Installation and user’s guide 1-7