42
4
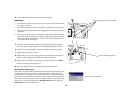
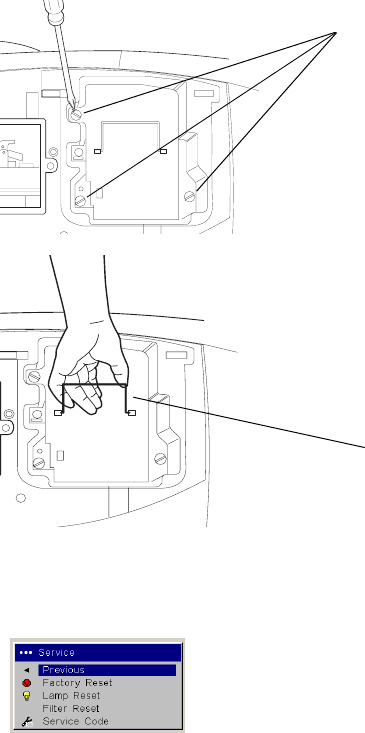
Loosen the three captive screws on the lamp module.
WARNINGS:
• To avoid burns, allow the projector to cool for at least 60 minutes before
you replace the lamp.
• Do not drop the lamp module. The glass may shatter and cause injury.
• Do not touch the glass lamp screen. Fingerprints can obscure projection
sharpness.
• Be extremely careful when removing the lamp housing. In the unlikely
event that the lamp ruptures, small glass fragments may be generated.
The lamp module is designed to contain most of these fragments, but
use caution when removing it.
5 Carefully remove the lamp module by grasping and lifting the metal
bail wire. Dispose of the lamp in an environmentally proper manner.
6 Install the new lamp module, making sure that it is properly seated.
7 Tighten the three captive screws.
8 Replace the cover over the lamp module by inserting the tabs into the
tab bays and pushing the rest of the cover down into place.
9 Plug in the power cable, press the power switch then press the Power
button to turn the projector back on.
10 Reset the lamp hour timer. See page 39 for more information.
Resetting the lamp timer
If the lamp timer has reached the maximum number of hours for the projec-
tor lamp, the LED on the projector’s keypad will show a lamp error (see
“LED Behavior” on page 47). To reset the lamp timer, simultaneously press
the decrease volume button and increase volume button on the keypad for
10 seconds. At that point the LED will turn green and you can power on the
projector. You can also navigate to the Settings>Service menu and select
Lamp Reset to reset the lamp timer.
loosen the captive screws on lamp module
remove module using bail wire
reset lamp time in Service menu


