


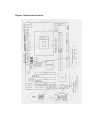
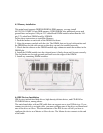

These connectors connect to an ATX 12V power supply. The plugs from the power
supply are designed to fit these connectors in only one orientation. Find the proper
orientation and push down firmly until the connectors completely fit. In addition to the
20-pin ATXPWR1 connector, connect the 4-pin ATX +12v power plug to provide
sufficient power to the CPU.
Note1: Make sure that you ATX 12V power supply can provide at least 15A on the
+12V lead and at least 2A on the +5-volt standby lead (+5VSB). The minimum
recommended wattage is 300W or above for a fully configured system. The system
may become unstable and may experience difficulty powering up if the power
supply is inadequate.
Note2: Do not forget to connect the 20-pin ATXPWRI and 4-pin ATX12V1power
plugs. Failure to do so may cause severe damage to the CPU or motherboard!
Chapter 5 Driver Installation
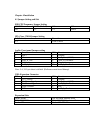
5.1 Installation Directory
The utility CD is supplied with that main board the connects contained in it is showed as
below:
Directory Driver OS
INTEL\INF\XXX Intel chipset software
Windows 9x
Windows 2000/XP
Windows NT4.0
INTEL\IAA\845\XXX Intel IAA setup
Windows 9X/SE/XP
Windows 2000/XP
SOUND\REALTEK\XXX
Realtek AC’ 97 Audio
driver
Windows 9x
Windows 2000/XP
Windows NT4.0
INTEL\USB2.0\845 USB 2.0 driver setup
Windows 9x
Windows 2000/XP
Windows NT4.0
INTEL\VGA\845 VGA driver setup
Windows 9x
Windows 2000/XP
Windows NT4.0
Before installing audio driver, you must identify the mode of AC’ 97 codec.
For example: If you use realtek serial codec, you need to enter into the realtek directory
installing.
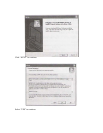
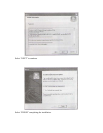
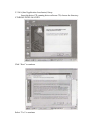
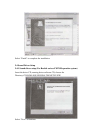
5.2 Intel Chipset Software Setup
Insert the driver CD, running driver software CD, choose the directory: \CD-
ROM:\INTEL\INF\XXX