


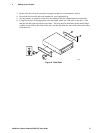
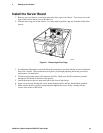


2 Setting Up the Chassis
Intel® Entry Server Chassis SC5275-E User Guide 24
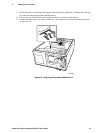
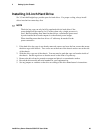
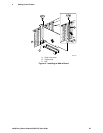
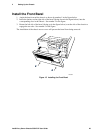
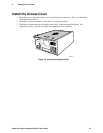
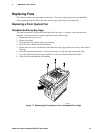
Installing an Add-in Board
You may want to install an operating system before installing any add-in boards. If so, skip this
step and return to it when you are ready.
CAUTIONS
Do not overload the server board by installing add-in boards that draw
excessive current.
Add-in boards can be extremely sensitive to ESD and always require careful
handling. After removing the board from its protective wrapper or from the
server board, place it component side up on a grounded, static free surface or
conductive foam pad if available. Do not slide the board over any surface.
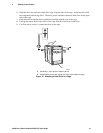
1. Remove the screw for the expansion slot.
2. Remove and save the expansion slot cover in case you later remove the add-in card.
3. Remove the add-in board from its protective wrapper. Be careful not to touch the components
or gold edge connectors. Place board on an antistatic surface.
4. Record the type and serial number of the add-in board in your equipment log.
5. Set jumpers or switches according to the manufacturer’s instructions.
6. Hold board by its top edge or upper corners. Firmly press it into an expansion slot on the
server board. The end of a full-length expansion card must slide into the plastic card guide slot
at the front of the chassis and the tapered foot on the expansion card bracket must fit into the
slot in the retention slot frame.
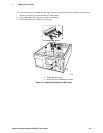
7. Align the rounded notch in the retaining bracket of the expansion card with the threaded hole in
the frame. The bracket fits the space that was occupied by the slot cover.
8. Use the screw removed earlier. Insert it into the threaded hole, and tighten it firmly. Attach
cables if necessary.
✏
NOTE
When removing a full-length add-in card, you must pull back on the latch on
the plastic card guide at the front of the chassis to release the card from the
card guide.