


JVC DILA projector Firmware Update Instructions
Page 4 of 6
UPDATE PROJECTOR FIRMWARE
With the projector in Standby Mode, remove the mains lead from the projector
and wait until the Standby LED goes out.
Hold down the Standby/On button on the projector and plug the mains lead back
in while still holding the button down. The three LEDs on the projector should all
light to show that the projector is in Download Mode.
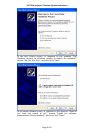
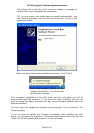
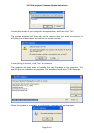
Start the ILA-FPJ Updater.exe program. This will display the following:
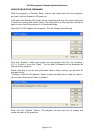
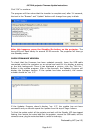
Click the “Browse” button and select the appropriate data file (for example:
X3_V1_3.brec2), then click “Open”. The full path & filename will be displayed at
the top of the program.
Please note that if you are using Windows Vista or Later version, you will have to
navigate to the
“\Program Files\ILA-FPJ\Updater” folder to open the data file as Vista will open in
your profile’s Document Folder by default.
Next, click the “Update” button. The program will then ask you to choose the
model number of the projector.