


11
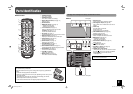
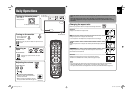
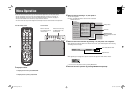
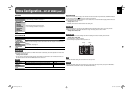
Displaying the current status
The information of the current input is displayed.
NOTE
• When no signal is input, “NO SYNC” appears. When a signal this monitor does not
support is input, “Out of range” appears.
• When “STATUS DISPLAY” on the set-up menu is set to “AUTO” (see page 15), the
status is also displayed in the following cases:
– When you turn on the monitor
– When you change inputs
– When you change signal types.
Selecting the picture mode
Each time you press the button, the picture mode changes.
DYNAMIC: Suitable for displaying documents for presentation.
NORMAL: Displays the original picture.
USER: You can adjust picture quality as you like (see “PICTURE SETTING” on
page 13).
NOTE
• The picture mode is stored for each input.
• You can adjust the picture quality, such as brightness, for each picture mode. The
setting you have made is stored (see “PICTURE SETTING” on page 13).
• When the Multi Display (see page 14) or the Dual Display (see the left) is in use,
the picture mode cannot be changed.
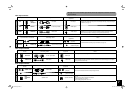
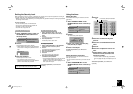
Activating the Dual Display
You can view two Inputs at the same time—Dual
Display.
PIP (Picture In Picture) mode PBP (Picture By Picture) mode
• Each time you press the buttons, the Dual Display turns on or off.
• When the Dual Display is activated, the current input is displayed on the main
window. Select the input for the sub window* on “DUAL DISPLAY” of “FUNCTION
SETTING” (see page 14).
• The audio signals for the main window are emitted from the speaker.
• To turn off the Dual Display, press the same button again.
* You cannot select the same input as that of the main window and DVI input for the
sub window.
NOTE
• Use the main menu to adjust position and/or size of the sub window (see “DUAL
DISPLAY” on page 14).
Sub window
Main window
Sub window
Current input
Input signal format
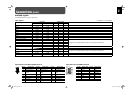
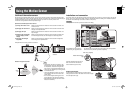
Controlling only the monitor with
specified ID
When using several monitors at once, you can control only a
desired monitor by specifying its ID.
• To assign the ID, see “ID” on page 14.
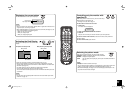
To select the ID of the monitor to control
1 Press ID ON.
ID of each monitor is displayed.
2 Press number buttons to enter the desired ID.
3 Press OK.
Now you can control only the monitor with the ID you have specified.
To control a monitor with another ID, cancel the ID control, then perform the
procedure above.
To cancel the ID control, press ID OFF.
DVI
1400 x 1050A 60Hz
Main window
ID : 01
GM-F470S_EN.indd 11GM-F470S_EN.indd 11 08.12.26 10:35:43 AM08.12.26 10:35:43 AM