EN
11
Master Page: Right
03M2D2(MEGA-Mac)-ImageMixer.fm Page 11
5
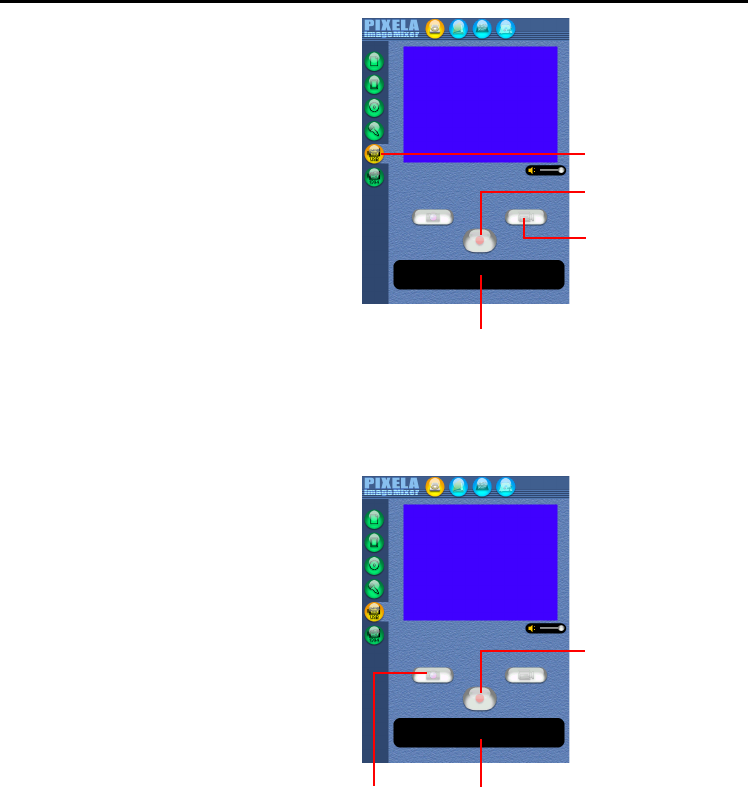
Click the USB input (USB) button.
The USB input mode screen appears.
6
Click the Video button.
The amount of available storage space is
displayed in the information display panel.
7
Click the Capture button.
The capture operation begins, and the message
[Capture in progress] appears.
8
Click the Capture button again.
The capture operation ends, and the message
[Converting to MPEG] appears. Once
conversion ends, the video file (extension
“.mpg”) is registered in the album.
NOTE:
If you are using Windows
®
2000 and the MPEG1
files cannot be converted to MPEG4 files with
ImageMixer, install Windows Media™ Player
(version 7 or later). Windows Media™ Player can
be loaded from Microsoft’s web site:
http://www.microsoft.com/
Capturing still images
1
Click the Still image button.
The message [Still image capture enabled]
appears on the information display panel.
2
Click the Capture button.
The video image at the moment that the button
was clicked is captured, and the resulting still
image file (extension “.jpg”) is registered in the
album.
● Camcorder operations are limited to the
zoom switch, the focus button, and the still
image button.
NOTES:
● It is not possible to capture videos or still images
if the USB Mass Storage Class driver is not
installed properly. In this case, refer to “Updating
[Device Manager] (Windows
®
)” (੬ pg. 8) in the
Software Installation and USB Connection
Guide.
● On the information display panel or the file
information dialog, some information such as
file-created date may be incorrect.
Disconnecting the USB cable
1
Disconnect the USB cable.
2
Set the Power Switch on the camcorder to “OFF”.
The camcorder turns off.
USB input (USB)
Capture
Video
Information display panel
Capture
Information display panel
Still image
CAPTURING VIDEO (cont.)
