


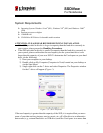
SSDNow
For Notebooks
8
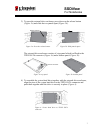
5) Align the top and bottom panels of the enclosure and slide them together until
they snap into place (Figure 5).
Figure 5: Snap panels in place.
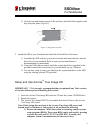
2. Install the SSD in your Notebook and attach the External Drive Enclosure:
1) Assemble the SSD with the system drive bracket and insert the drive into the
drive bay of your notebook. Refer to your system manufacturer’s
documentation for instructions.
2) Using the USB cable provided, attach the system hard drive (installed in the
provided external drive enclosure) to your notebook via any USB port.
3) You are now ready to copy your data from the system hard drive to the SSD
using the cloning software CD provided.
Setup and Use Acronis
®
True Image HD
IMPORTANT: ** It is strongly recommended that you uninstall any Trial versions
of Acronis software prior to installing full versions.
1. Insert the Acronis True Image HD software CD into the system CD-ROM drive.
2. Restart the system.
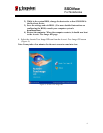
3. The Acronis True Image HD CD is a bootable disk and will boot to the Acronis
True Image HD screen.
Note: If the system does not boot to the Acronis True Image HD screen and
instead boots to Windows or fails to boot at all, perform the following:
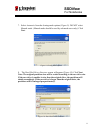
1) Restart the computer. While the system is restarting, run the system
setup program (BIOS). The system BIOS can be activated by pressing
a special key such as ESC, F1, F12 or DELETE. (Consult your
computer system’s documentation for the correct key.)