


www.kodak.com/go/aiosupport 12
KODAK HERO 3.1 All-in-One Printer
4. To scroll through the information, press .
5. When you are done, press OK.
Printing the network configuration
To print the current network configuration:
1. Load plain paper into the printer. (See Loading plain paper, page 22.)
2. Press Home.
3. Press to select Network Settings, then press OK.
4. Press to select Print Network Configuration, then press OK.
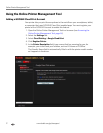
Installing your printer on additional computers on the network
To add your printer to another computer(s) on your network, install the KODAK
All-in-One Printer Software on each computer.
1. Go to www.kodak.com/go/aiodownloads.
2. In the results list, click the link for KODAK All-in-One Printer Software for your
computer operating system.
3. Follow the on-screen instructions.
Connecting to another KODAK All-in-One Printer
If you are connecting to a newer model printer (for example, you have an ESP 7
printer and now you are adding a HERO 3.1 printer), you must install the software for
the newer model.
NOTE: When you install the new software, the printer driver for the ESP 7 printer
will be uninstalled, and an upgraded driver for the ESP 7 printer will be
installed in addition to the driver for the HERO 3.1 printer.
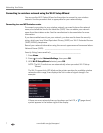
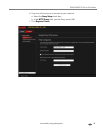
On a computer with WINDOWS OS:
1. Select Start > All Programs > Kodak > Kodak Printer Setup Utility.
• If your wireless printer (example: KodakHERO3.1+0034) is not listed:
a. Select No, my printer is not listed, then click Next.
b. From the drop-down list, select your printer, then click
Next.
c. Select Network - Wireless/Wi-Fi, then click Next.
When your printer is detected, driver installation begins.
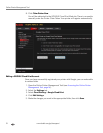
• If your wireless printer (example: KodakHERO3.1+0034) is listed:
a. Select the printer that is connected to your network, then click
Next.
b. Select Yes, my printer is listed, then click Next.
When your printer is detected, driver installation begins.
2. When driver installation is complete, click Done.