


12 A-61506 September 2006
Using an Uncorrected
image as a starting point
1. Open the Brightness and Contrast Control application. The main
window will be displayed.
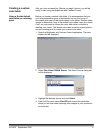
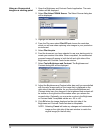
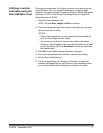
2. Select File>Select TWAIN Source. The Select Source dialog box
will be displayed.
3. Highlight the desired source and click Select.
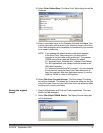
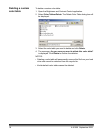
4. From the File menu select File>DPI and choose the resolution
which you will use when capturing color images in your production
environment.
5. Select File>Acquire.
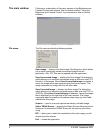
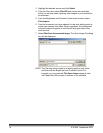
6. Feed the document you have selected to use as a starting point to
create your custom color table. When completed, the uncorrected
scanned image will appear in both the left and right sides of the
Brightness and Contrast Control main window.
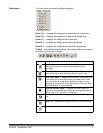
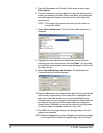
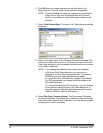
7. Select Tools>Brightness and Contrast. The Brightness and
Contrast dialog box will be displayed.
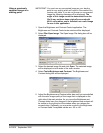
8. Adjust the Brightness and Contrast slider bars until you are satisfied
with the color image quality of the image that is displayed on the
right side of the main window. As you move the Brightness and
Contrast slider bars, the changes in the brightness and contrast will
be visible on the right side of the window when you release the
mouse button. Optionally, you may enter a value in the Brightness
or Contrast fields. Acceptable values are: -50 to +50.
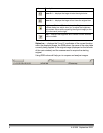
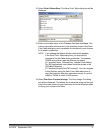
9. Click OK when the image displayed on the right side of the
Brightness and Contrast Control window is acceptable.
NOTE: Selecting Cancel will undo any changes and restores the
image on the right side of the main window to match the
original image (on the left side).