


MACINTOSHMACINTOSH
MACINTOSHMACINTOSH
MACINTOSHMACINTOSH
MACINTOSHMACINTOSH
MACINTOSHMACINTOSH
MACINTOSHMACINTOSH
MACINTOSHMACINTOSH
MACINTOSHMACINTOSH
MACINTOSHMACINTOSH
MACINTOSHMACINTOSH
MACINTOSHMACINTOSH
MACINTOSHMACINTOSH
MACINTOSHMACINTOSH
MACINTOSHMACINTOSH
MACINTOSHMACINTOSH
MACINTOSHMACINTOSH
MACINTOSHMACINTOSH
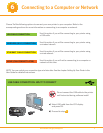
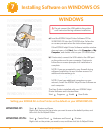
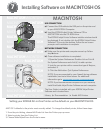
USB CONNECTION
a) Connect the USB cable to the USB port on the printer and
to your MACINTOSH Computer.
b) Load the KODAK Inkjet Printer Software CD for
MACINTOSH into the CD-ROM drive.
The KODAK Inkjet Printer Software installer window should
be displayed. If not, double-click the KODAK Inkjet Printer
Software CD icon on the desktop. Follow the on-screen
prompts until installation is complete.
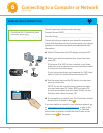
NETWORK CONNECTION
a) Make sure the printer and computer are set up. Follow
step b above.
b) Once software installation is completed:
1. Open the System Preferences. Double-click on Print &
Fax System Preferences and click (+) to add a printer.
2. Look for your printer with a connection type of Bonjour,
and select it.
3. Click the Add button. Quit System Preferences.
NOTE: If you are prompted by your fi rewall during software
installation, be sure to allow access. For additional
information go to
www.kodak.com/go/inkjetnetworking.
NOTE: If you have additional computers on your network,
install the Kodak Inkjet Printer Software on each computer.
The User Guide is installed with your KODAK Inkjet Printer
Software and is located here:
Library
Documentation Kodak AiO Printers
MACINTOSH
www.kodak.com/go/aiosupport
11
7
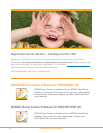
Installing Software on MACINTOSH OS
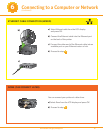
MAC OS X defaults to the printer most recently added. To change the default printer, follow these steps:
1. From the print dialog, choose Edit Printer List from the Printer pop-up menu.
2. Select a printer from the Printer List.
3. Choose Make Default from the Printer’s menu.
Setting your KODAK All-in-One Printer as the default on your MACINTOSH OS