3-2 Connecting and Printing
Connections
This section explains how to start up the printer.
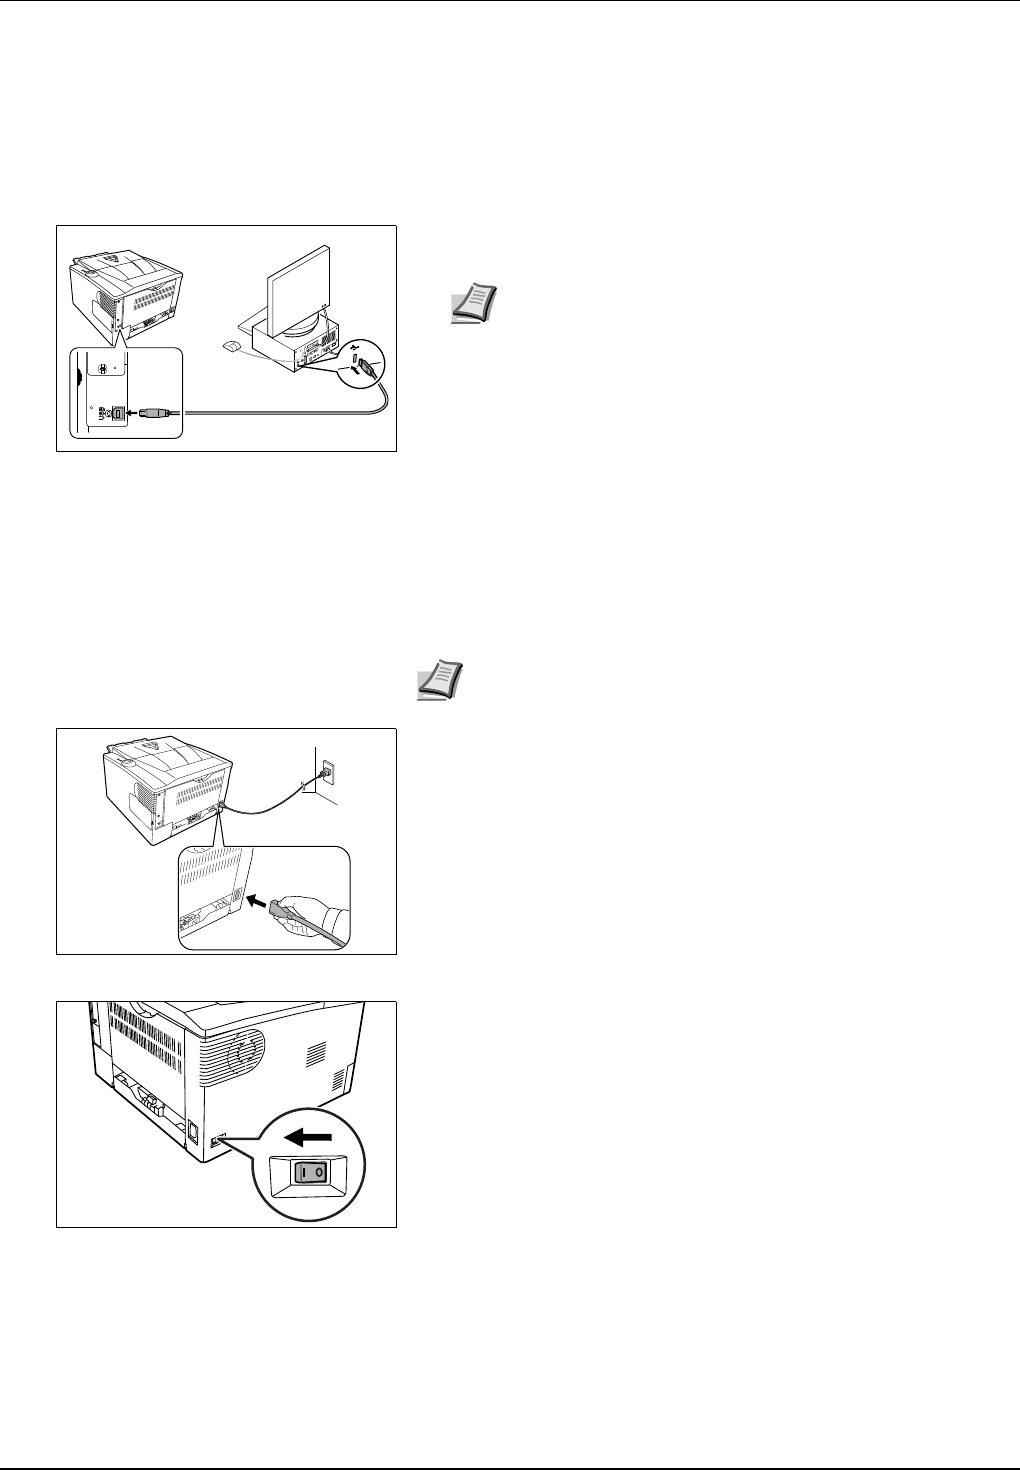
Connecting the USB Cable
Follow the steps as below for connecting the USB cable.
1 Connect the USB cable (not included) to the USB Interface
Connector.
2 Connect the other end of the USB cable to the computer's USB
interface connector.
Connecting the Power Cord
Install the printer close to an AC wall outlet. If an extension cord is used, the
total length of the power cord plus extension should be 5 meters (16 feet) or
less.
1 Connect the power cord to the Power Cord Connector at the rear of
the printer.
2 Connect the other end of the power cord to a power outlet.
3 Press the Power Switch to On ( | ). The printer begins to warm up.
Note Use a USB cable with a rectangular Type A plug and a
square Type B plug. The USB cable should be shielded and
no longer than 5 meters (16 feet) long.
Note Ensure the printer's power switch is off. Only use the power
cord supplied with the printer.
IMPORTANT If you install the toner container and switch on the
power, after a moment the indicators light in anticlockwise
direction. When the printer is first switched on after toner
installation, there will be a delay of approximately 15 minutes
before the printer gets ready to print. Once the [Ready] indicator
lights, printer installation is complete.


