18
18
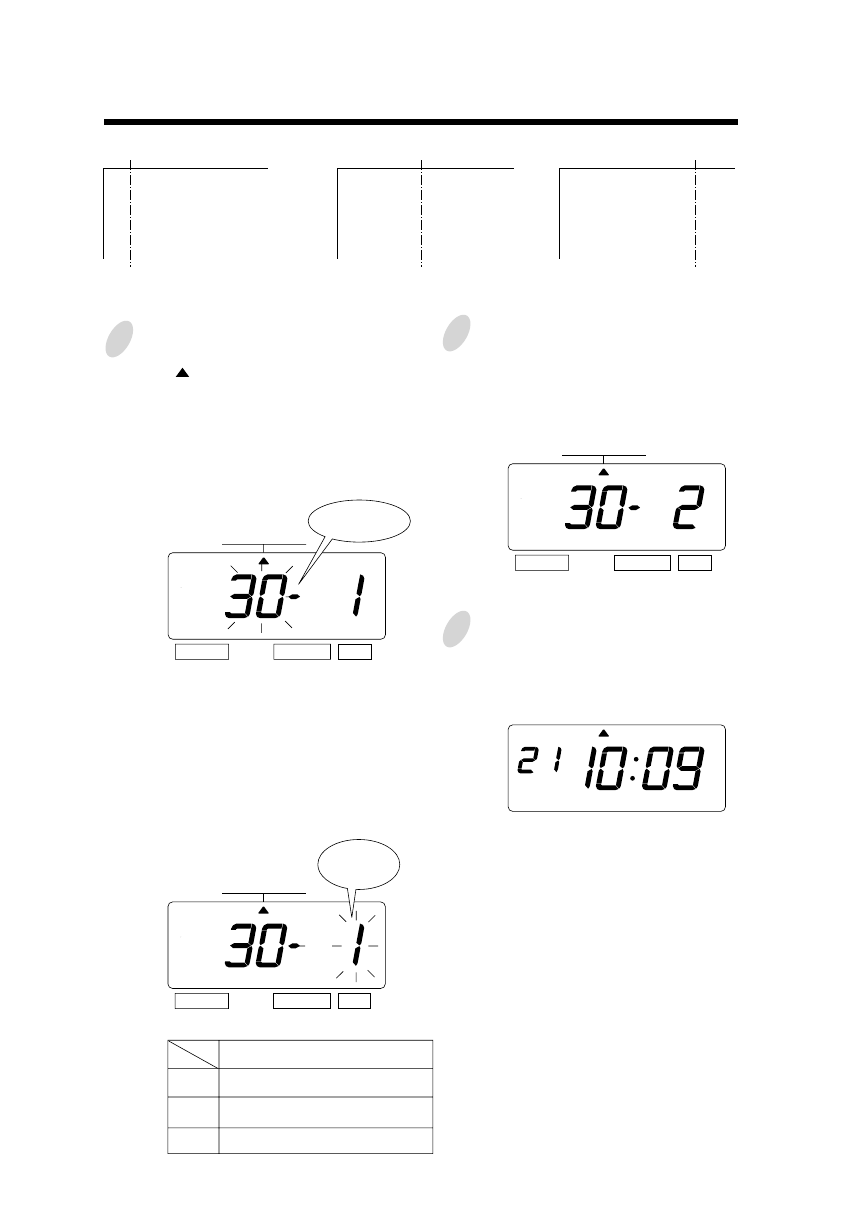
Press the [SELECT] button and position
the " " under the "PRINT ORDER"
mark.
At that moment, the flashing digit
indicates "Print Order Options".
(The flashing means it can be changed.)
In case of the example, press the
[SET] button because the "Print Order
Options" not to be changed. At that
moment, the flashing digit indicates
"Print position".
Change the "Print Position".
In case of example, press the
[CHANGE] button to set at "2". And
then press the [SET] button.
SELECT CHANGE SET
MO TU WE TH FR SASU
1.
2.
3.
Print Position
Left Orientated
Center Orientated
Right Orientated
Setting the Print Position of Customized Comments
ABC HOTEL
21 OCT '03
BOSTON, MA
Left orientated
ABC HOTEL
21 OCT '03
BOSTON, MA
Center orientated
ABC HOTEL
21 OCT '03
BOSTON, MA
Right orientated
Example: Change the print position to "Center orientated".
1
2
After you finish setting the print order
and the print position, press the [SET]
button once again.
Now the print order and the print
position settings have been completed.
Replace the cover and lock.
Important: If you do not complete Step
3, the Time Recorder will not print.
3
SELECT CHANGE SET
PRINT ORDER
PRINT ORDER
SELECT CHANGE SET
PRINT ORDER
Print
Position
Print Order
Options


