


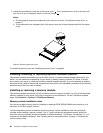
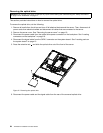

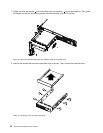
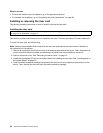
5. Route the cables through the drive bay hole in the front and then slide the optical drive into the drive
bay until it snaps into position.
Figure 15. Installing the optical drive
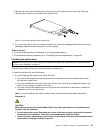
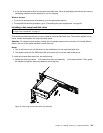
6. Connect the power cable to the optical drive power connector on the backplane. See “Locating
connectors on the backplane” on page 16.
7. Connect the signal cable to the SATA 5 connector on the system board. See “Locating parts on the
system board” on page 13.
What to do next:
• To work with another piece of hardware, go to the appropriate section.
• To complete the installation, go to “Completing the parts replacement” on page 64
.
Removing a hot-swap hard disk drive
Attention: Do not open your server or attempt any repair before reading and understanding the “Safety information”
on page iii and “Guidelines” on page 17.
This section provides instructions on how to remove a hot-swap hard disk drive. This section applies only to
server models that have hot-swap hard disk drives installed.
Attention: To maintain proper system cooling, do not operate the server for more than 10 minutes without
either a drive or a ller panel installed in each drive bay.
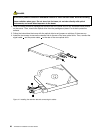
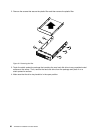
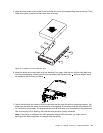
To remove a hot-swap hard disk drive, do the following:
Note: You do not have to turn off the server when removing a hot-swap hard disk drive.
Chapter 5. Installing, removing, or replacing hardware 27