


Installing a drive in bay 2
To install an optical drive or an additional hard disk drive in bay 2:
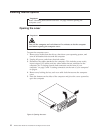
1. Open the computer cover. See “Opening the cover” on page 12.
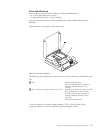
2. Remove the metal shield from the drive bay by using a flat-blade screwdriver
to gently pry it loose.
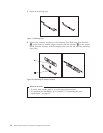
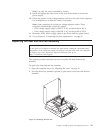
3. If you are installing a drive with accessible media, such as an optical drive,
remove the plastic panel in the bezel by squeezing the plastic tabs that secure
the panel on the inside of the bezel.
Note: If you are installing a 3.5-inch hard disk drive you must use a Universal
Adapter Bracket, 5.25 to 3.5-inch. You can obtain this bracket from a local
computer retailer or by contacting the Customer Support Center.
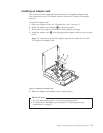
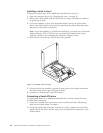
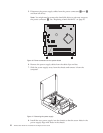
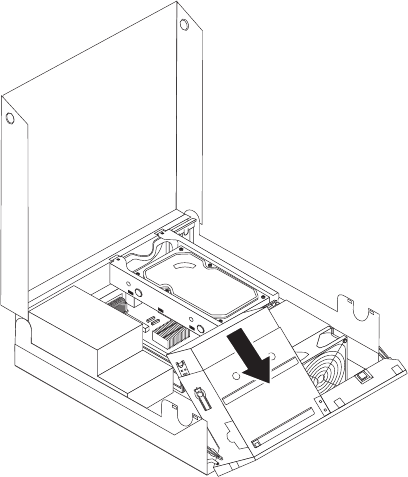
4. Slide the drive into the bay until it locks into position.
5. Pivot the drive bay assembly upward to gain access to the cable connections
and connect the drive signal and power cables.
6. Continue at “Connecting a Serial ATA drive.”
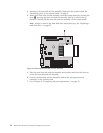
Connecting a Serial ATA drive
A serial optical drive or an additional hard disk drive can be connected to any
available SATA connector.
1. Locate the available SATA connector on the system board. See “Identifying
parts on the system board” on page 9.
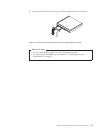
2. Using the signal cable that came with the new drive, connect one end of the
signal cable to the drive and the other to the available SATA connector on the
system board.
Figure 11. Installing a drive in bay 2
18 ThinkCentre Hardware Installation and Replacement Guide