


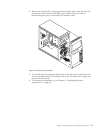

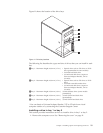
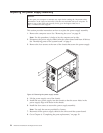

2. Remove the front bezel by releasing the three plastic tabs on the left side and
pivoting the bezel outward. Carefully set the bezel to the side without
disconnecting the power switch and LED assembly cable.
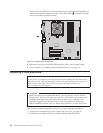
Note: Notice the spare retainer bracket 1 attached to the side of the upper
drive cage.
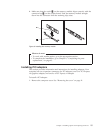
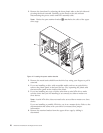
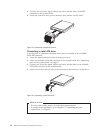
3. Remove the metal static shield from the drive bay using your fingers to pull it
outward.
4. If you are installing a drive with accessible media, such as an optical drive,
remove the plastic panel in the bezel for bay 2 by squeezing the plastic tabs
that secure the panel on the inside of the bezel.
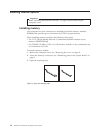
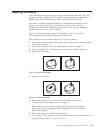
5. If you are installing any type of drive other than a serial ATA drive, make
sure the drive that you are installing is set correctly as either a master or a
slave device.
Note: A serial ATA drive does not need to be set as either a master or a slave
device.
If you are installing a parallel ATA drive, set it as a master device. Refer to the
documentation that comes with your drive for master/slave jumper
information.
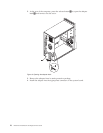
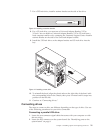
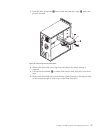
6. Remove the retainer bracket from the upper driver cage by sliding it
downward.
Figure 12. Locating the spare retainer bracket
20 Hardware Installation and Replacement Guide