


3 From the Printer List, choose Add, and then click IP Printer.
4 Type the IP address of the printer in the address field, and then click Add.
b For AppleTalk printing:
Notes:
• Make sure AppleTalk is activated on your printer.
• This feature is supported only in Mac OS X version 10.5 or earlier.
In Mac OS X version 10.5
1 From the Apple menu, navigate to:
System Preferences > Print & Fax
2 Click +, and then navigate to:
AppleTalk > select the printer from the list > Add
In Mac OS X version 10.4
1 From the Finder, navigate to:
Applications > Utilities
2 Double‑click Printer Setup Utility or Print Center.
3 From the Printer List, click Add.
4 Click Default Browser tab > More Printers.
5 From the first pop‑up menu, select AppleTalk.
6 From the second pop‑up menu, select Local AppleTalk Zone.
7 Select the printer from the list, and then click Add.
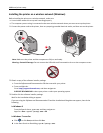
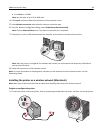
Installing the printer on an Ethernet network
Note: Make sure you have completed the initial setup of the printer.
For Windows users
1 Obtain a copy of the software installer package.
• From the Software and Documentation CD that came with your printer.
• From our Web site:
Go to
http://support.lexmark.com, and then navigate to:
SUPPORT & DOWNLOAD > select your printer > select your operating system
2 Double‑click the software installer package.
Wait for the installation dialog to appear.
If you are using the Software and Documentation CD and the installation dialog does not appear, then do the
following:
In Windows 8
From the Search charm, type run, and then navigate to:
Apps list > Run > type D:\setup.exe > OK
Additional printer setup 51