40
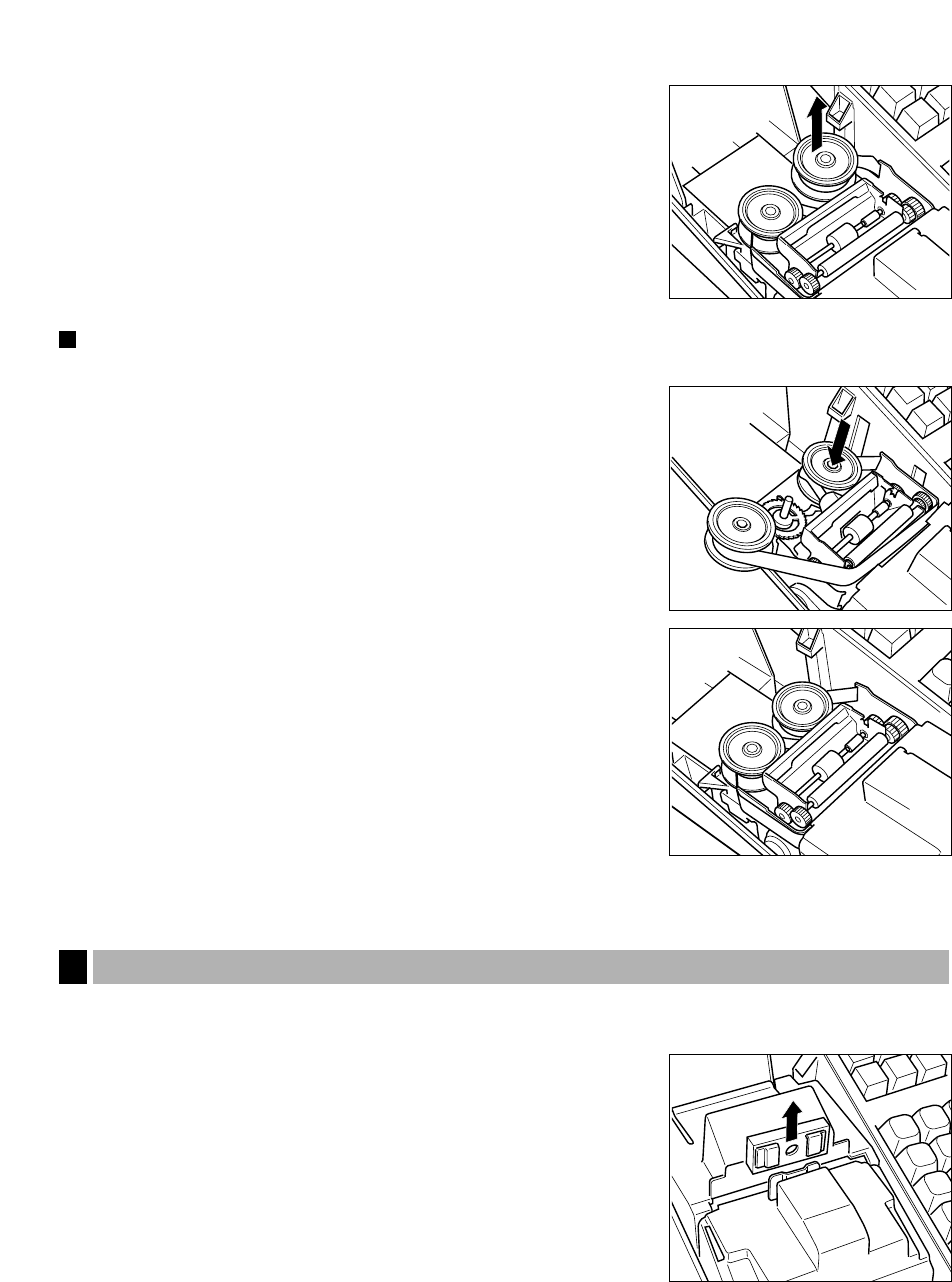
4. Remove the ink ribbon.
Remove the reel that is not locked by the reel stopper first, and tip the
stopper to the opposite side and remove the another reel. To remove
the reels, pull them upwards.
Installation
The protruding side of reels must face downward. So, note which reel is the left one and which is the right.
1. Install the reel at the side that the reel stopper is not tipped. Rotate
the reel to the right or to the left until it clicks into place.
2. Run the ink ribbon correctly through the printer as shown on the right
sketch. Note that the ribbon is placed along the outside of the metal
brackets.
3. Install the other reel in the same way, and rotate either reel to take up
slack from the ribbon.
4. Replace the ink ribbon cover.
If the logo becomes too light, it’s time to refill the logo ink. You must use the logo ink specified by SHARP.
Consult your dealer for the logo ink. For refilling the logo ink, follow the procedure given below.
1. Remove the printer cover.
2. Remove the logo by pulling it straight up in the direction of the arrow.
Ink refill (ER-A180 only)
4


