A13
On Screen Display(OSD) Selection and Adjustment
Main menu Sub menu Description
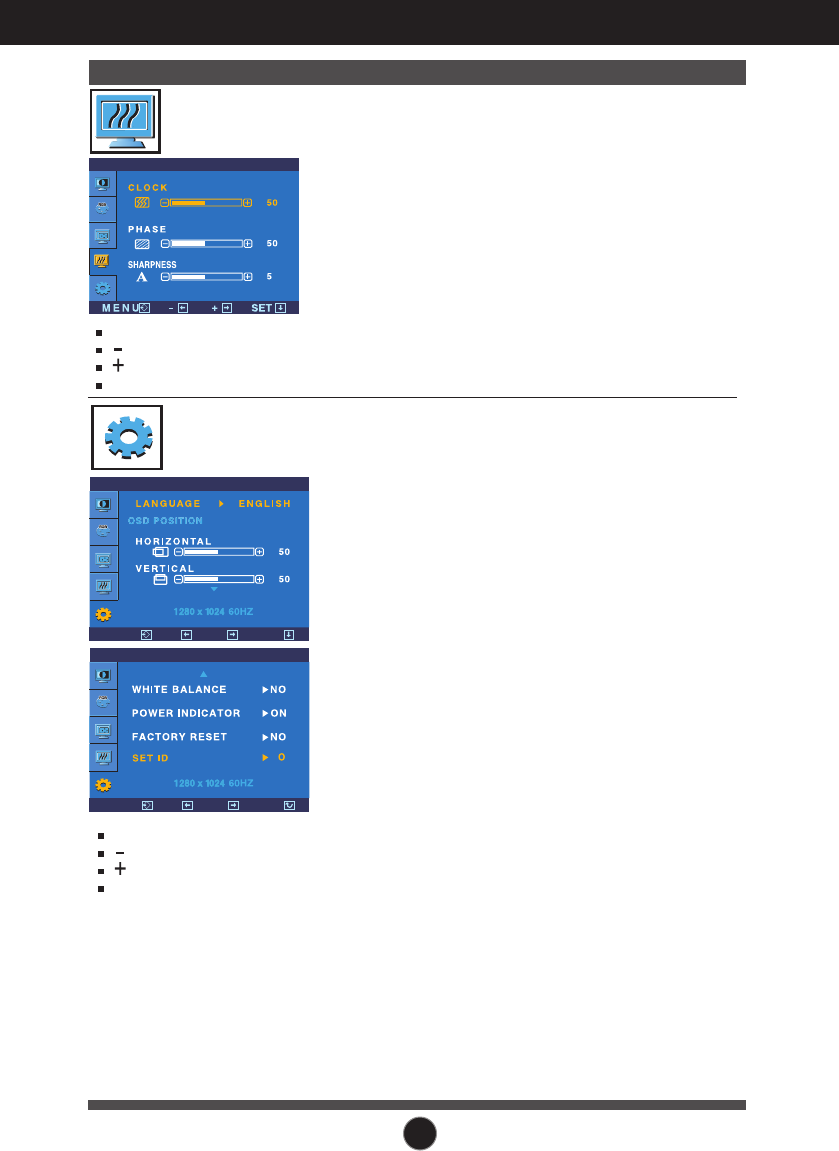
CLOCK
PHASE
SHARPNESS
To minimize any vertical bars or stripes
visible on the screen background.
The horizontal screen size will also
change.
To adjust the focus of the display.
This item allows you to remove any
horizontal noise and clear or sharpen
the image of characters.
To adjust the clearness of the screen.
TRACKING
If this does not improve the screen image, restore the factory default settings.
If necessary, perform the white balance function again. This function will be enabled only when the input
signal is an analog signal.
MENU : Exit
: Decrease
: Increase
SET : Select another sub-menu
SETUP
MENU : Exit
: Adjust
: Adjust
SET : Select another
sub-menu
To choose the language in which the
control names are displayed.
To adjust position of the OSD window
on the screen.
LANGUAGE
OSD
POSITION
WHITE
BALANCE
FACTORY
RESET
If the output of the video card is different
the required specifications, the color
level may deteriorate due to video
signal distortion. Using this function, the
signal level is adjusted to fit into the
standard output level of the video card
in order to provide the optimal image.
Activate this function when white and
black colors are present in the screen.
POWER
INDICATOR
Restore all factory default settings except
"LANGUAGE."
TRACKING
SETUP
MENU
-
+
SET
SETUP
MENU
-
+
SET
Use this function to set the power
indicator on the front side of the monitor
to ON or OFF.
If you set OFF, it will go off.
If you set ON at any time, the power
indicator will automatically be turned on.
Press the + button to reset immediately.
You can assign a unique SET ID NO
(name assignment) to each monitor when
several monitors are connected for display.
Specify the number (0 ~ 99) using the
-
,
+
button and exit. Use the assigned SET ID
to individually control each monitor using
the Monitor Control Program.
SET ID


