


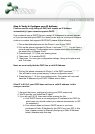

Step 2: Verify & Configure your IP Address
First we need to verify that your PAP2 will acquire an IP Address
automatically if your network supports DHCP.
If your network uses a DHCP Server to assign IP Addresses to network devices,
or if you are connecting the PAP2 to a home router such as a Linksys or Netgear
router or a modem that supports DHCP/NAT, please do the following:
1. Plus a standard telephone into the Phone 1 port of your PAP2.
2. Pick up the phone connected to Phone 1 and enter “* * * *”. You will hear a
voice prompt saying “Configuration menu: please enter option followed by
the pound key, or hangup to exit”.
3. Press the keys 1 0 1 # on your analog phone.
4. Then press 1 # to enable DHCP.
5. Then press 1 to save your configuration settings. Hang up the phone and
wait 2 minutes.
Next, we must verify that the PAP2 has a valid IP Address:
1. Pick up the phone connected to Phone 1 of the PAP2 and enter “* * * *”.
You will hear a voice prompt saying “Linksys configuration menu”.
2. Press the keys 1 1 0 # on your analog phone. The system will now read
back the IP address of your PAP2. Please write it down.
If the IP is 0.0.0.0, your PAP2 does not have a valid IP address. In this
case you need to:
1. Hang up the phone, unplug and re-plug your PAP2 power cord.
2. Wait 2 minutes, and check the IP again.
3. If you still get 0.0.0.0, there can be two reasons for this:
a. Your DHCP Server is not assigning an IP address to the PAP2 (in
which case you should contact your network administrator or ISP
for assistance).
b. Your network does not have a DHCP server or you have
purchased a Static IP Address for the PAP2 from your ISP. In this
case, please proceed to Manually Assigning a Static IP Address `
below, otherwise skip this step.