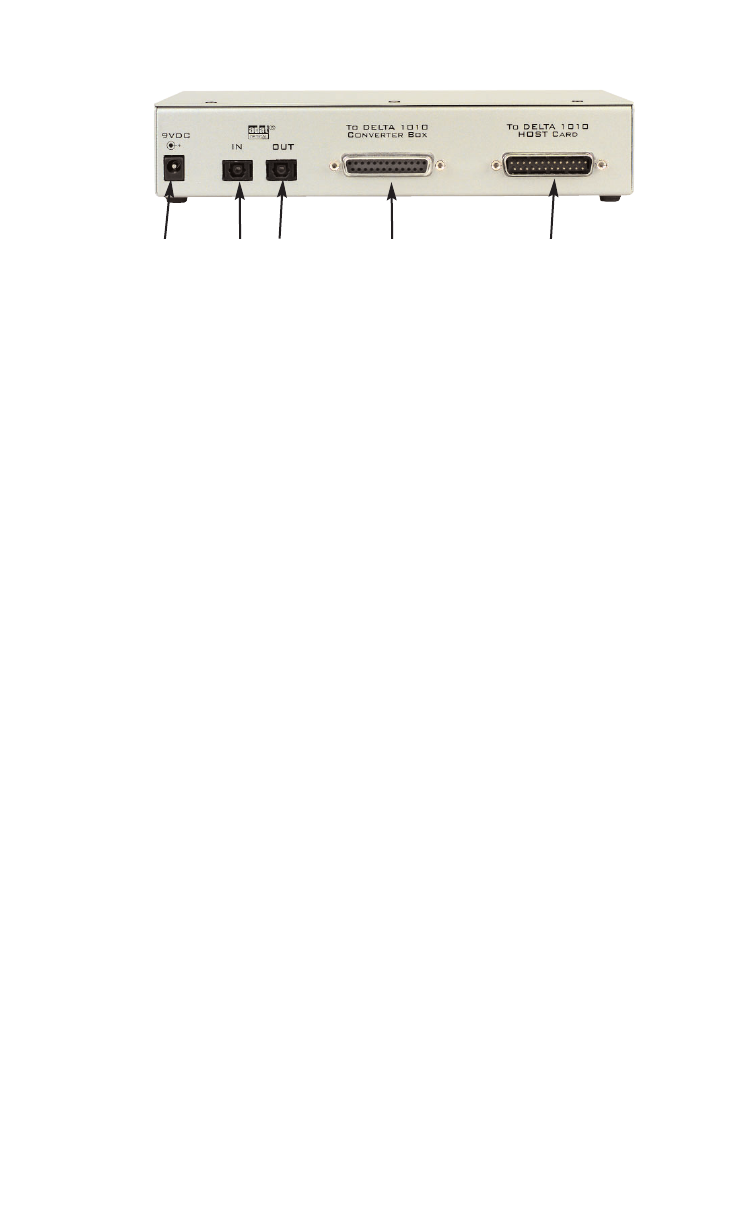
Back Panel
1. 9v DC Power Adapter Jack: This jack accepts a 2.5 mm, 9v center positive
500 mA power supply, provided with your Delta 1010-AI. Use only the
proper power supply to power your Delta 1010-AI.
2. ADAT In Jack: This TOSlink standard optical jack accepts an 8-channel
ADAT optical output signal on a standard TOSlink plug.
3. ADAT Out Jack: This TOSlink standard optical jack accepts a standard
TOSlink plug, sending an 8-channel ADAT optical signal.
4. “To Delta 1010 Converter Box” 25-pin female D type connector: This
connector transfers information to and from the Delta 1010 rack mount unit
using the male to male printer cable supplied with your Delta 1010
Recording Interface.
5. “To Delta 1010 Host Card” 25-pin male D type connector: Using the
standard printer cable that came with your Delta 1010-AI, this connector
will transfer information to and from the Delta 1010 PCI host card and the
Delta 1010-AI.
Setting up the Delta 1010-AI with your Delta 1010
If you already have your Delta 1010 PCI Recording System installed, make sure
that you have your computer’s power turned OFF before following this
procedure. If you have not yet installed your Delta 1010 PCI host card, you
may incorporate the Delta 1010-AI setup when hooking up your Delta 1010.
1. Connect the male end of the supplied 25-pin cable to the Delta 1010’s PCI
“host card,” which has been properly seated and secured in one of your
computer’s PCI expansion slots.
2. Connect the female end of the supplied 25-pin cable to the Delta 1010-AI’s
“To Delta 1010 Host Card” connector on the back of the Delta 1010-AI.
3. Connect one end (male) of the 25-pin cable that came with your Delta 1010
Recording System into the “To Delta 1010 Converter Box” connector on the
back of the Delta 1010-AI Interface.
4. Connect the other end (also male) of the 25-pin cable that came with your
Delta 1010 Recording System to the rack mount unit of the Delta 1010.
➊
➋
➌
➍
➎
4


