


34007776EN/AB - Page 12
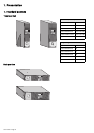
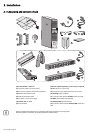
2. Installation
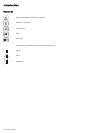
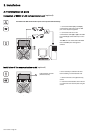
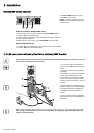
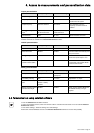
HotSwap MBP-module operation
UPS start-up with the HotSwap MBP module
1 - Check that the UPS is correctly connected to the HotSwap MBP module.
2 - Set switch (53) to the Normal position.
3 - Start the UPS by pressing the ON/OFF button (27) on the UPS control panel.
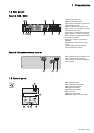
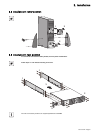
The load is supplied by the UPS.
LED (51) "UPS ON - OK to switch" on the HotSwap MBP module goes ON.
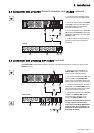
HotSwap MBP-module test
1 - Set switch (53) to the Bypass position and check that the load is still supplied.
2 - Set switch (53) back to the Normal position.
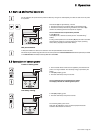
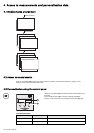
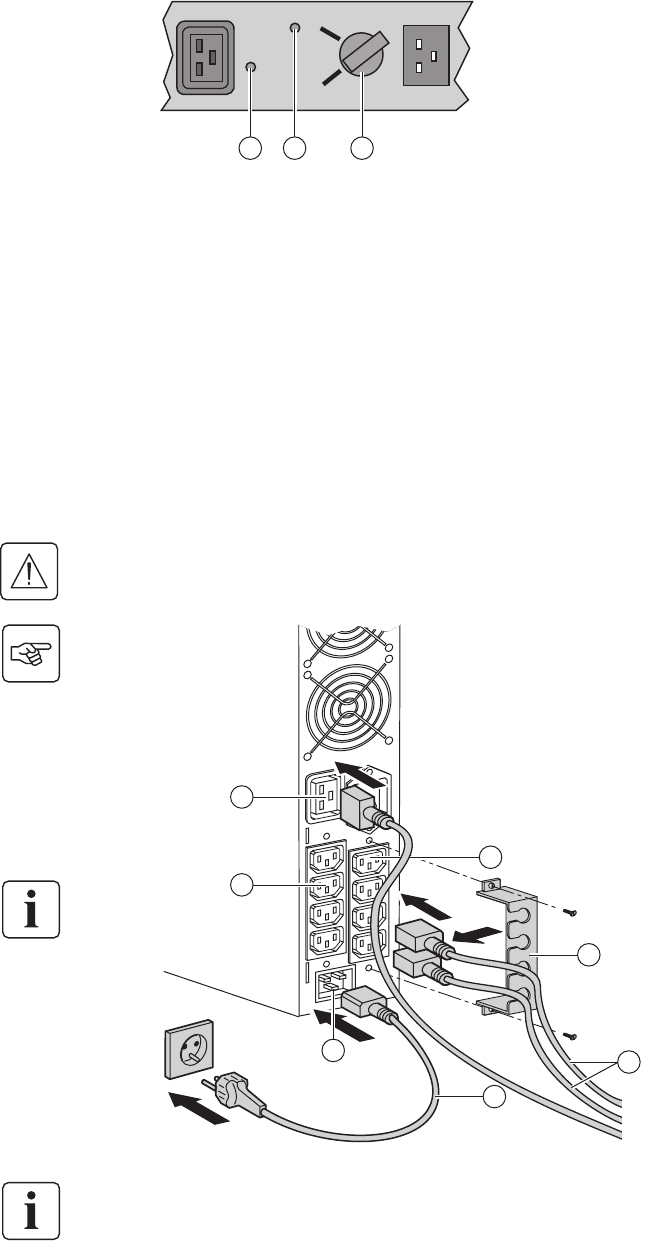
2.7 UPS connection without a FlexPDU or HotSwap MBP module
The HotSwap MBP module has a rotary
switch (53) with two positions:
Normal - the load is supplied by the UPS,
Bypass - the load is supplied directly by the
AC-power source.
Check that the indications on the name plate located on the back of the UPS correspond to the AC-power source and
the true electrical consumption of the total load.
1 - Connect the supplied cable (31) (250 V -
16 A) to the socket (10), then to the AC-power
source.
2 - Connect the loads to the UPS using the
cables (32).
It is preferable to connect the priority loads to
the four outlets marked (9) and the non-
priority loads to the four outlets marked (8)
that can be programmed in pairs (1 and 2).
Connect any high-power devices to the 16 A
outlet (7).
To program shutdown of outlets (8) during
operation on battery power and thus optimise
the available backup time, the MGE UPS
SYSTEMS communications software is
required.
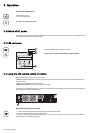
3 - Fit the connection securing system (35)
that prevents the plugs from being pulled out
accidentally.
Note. The UPS charges the battery as soon as it is connected to the AC-power source, even if button (27) is not pressed.
Once the UPS is connected to the AC-power source, eight hours of charging are required before the battery can
supply the rated backup time.
By-pass
Normal
UPS ON -
OK to switch
BY PASS SWITCH
51
52 53
10
8
9
31
32
35
7