


2
1. Introduction
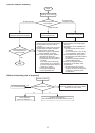
This projector can be controlled by connecting a personal computer with RS-232C terminal.
In addition, by connecting multiple projectors to each other in a daisy chain conguration, you can control each
projector from one personal computer.
PC-controllable functions:
• Turning the power ON or OFF
• Changing input signals
• Inputting commands by pressing the buttons on the control panel and remote control
• Menu setting
[Compatibility with the former models]
To use the RS-232C commands designed for the former models of Mitsubishi projector, by inputting
“00COMMAND0”, the projector responds in the same way as the former models. (No NAK is returned. For NAK
response, see page 4. ID code cannot be designated at command sending.)
(For the recommended procedure to use the former command systems, see “Controlling the projector using a
personal computer” for FL7000U.)
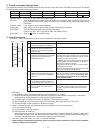
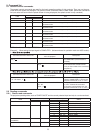
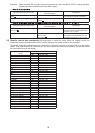
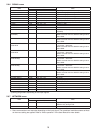
ITEM
Function
Data
Character ASCII code
Changing the RS-232C
command system
COMMAND
43h 4Fh 4Dh 4Dh 41h 4Eh 44h
0 (Former command system),
1 (New command system)
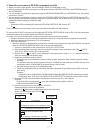
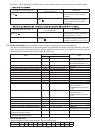
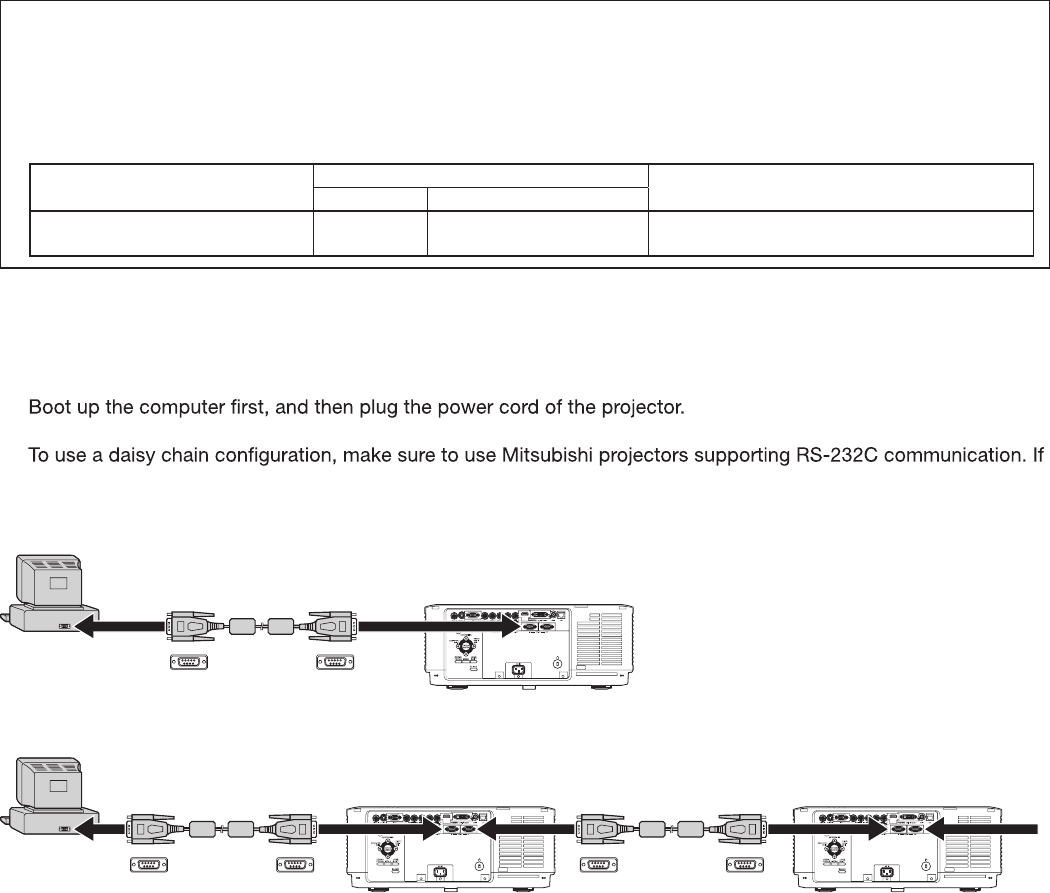
1.1 Connection
Important:
• Make sure that your computer and projector are turned off before connection.
•
(If you do not follow this instruction, the COM port may not function.)
•
the projectors or other devices made by other manufacturers are connected, operation is not guaranteed.
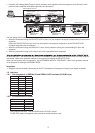
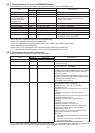
To connect with one projector:
RS-232C crossover cable
D-SUB 9-pin
To SERIAL IN
terminal
To RS-232C terminal
D-SUB 9-pin
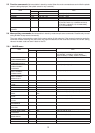
To connect with multiple projectors (in a daisy chain configuration):
RS-232C crossover cable
D-SUB 9-pin
To SERIAL IN
terminal
To RS-232C terminal To SERIAL IN
terminal
To SERIAL OUT
terminal
To SERIAL OUT
terminal
D-SUB 9-pin
RS-232C crossover cable
D-SUB 9-pinD-SUB 9-pin