


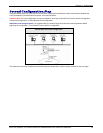

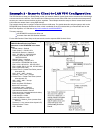
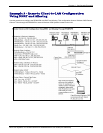
Chapter 4 – Configuration Examples
Multi-Tech Systems, Inc. RouteFinderVPN RF760/660/600VPN User Guide (PN S000323D) 32
Setup Networks & Services
Site A Configuration on the RouteFinder VPN in the Home Office
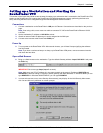
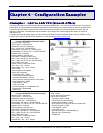
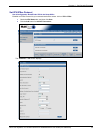
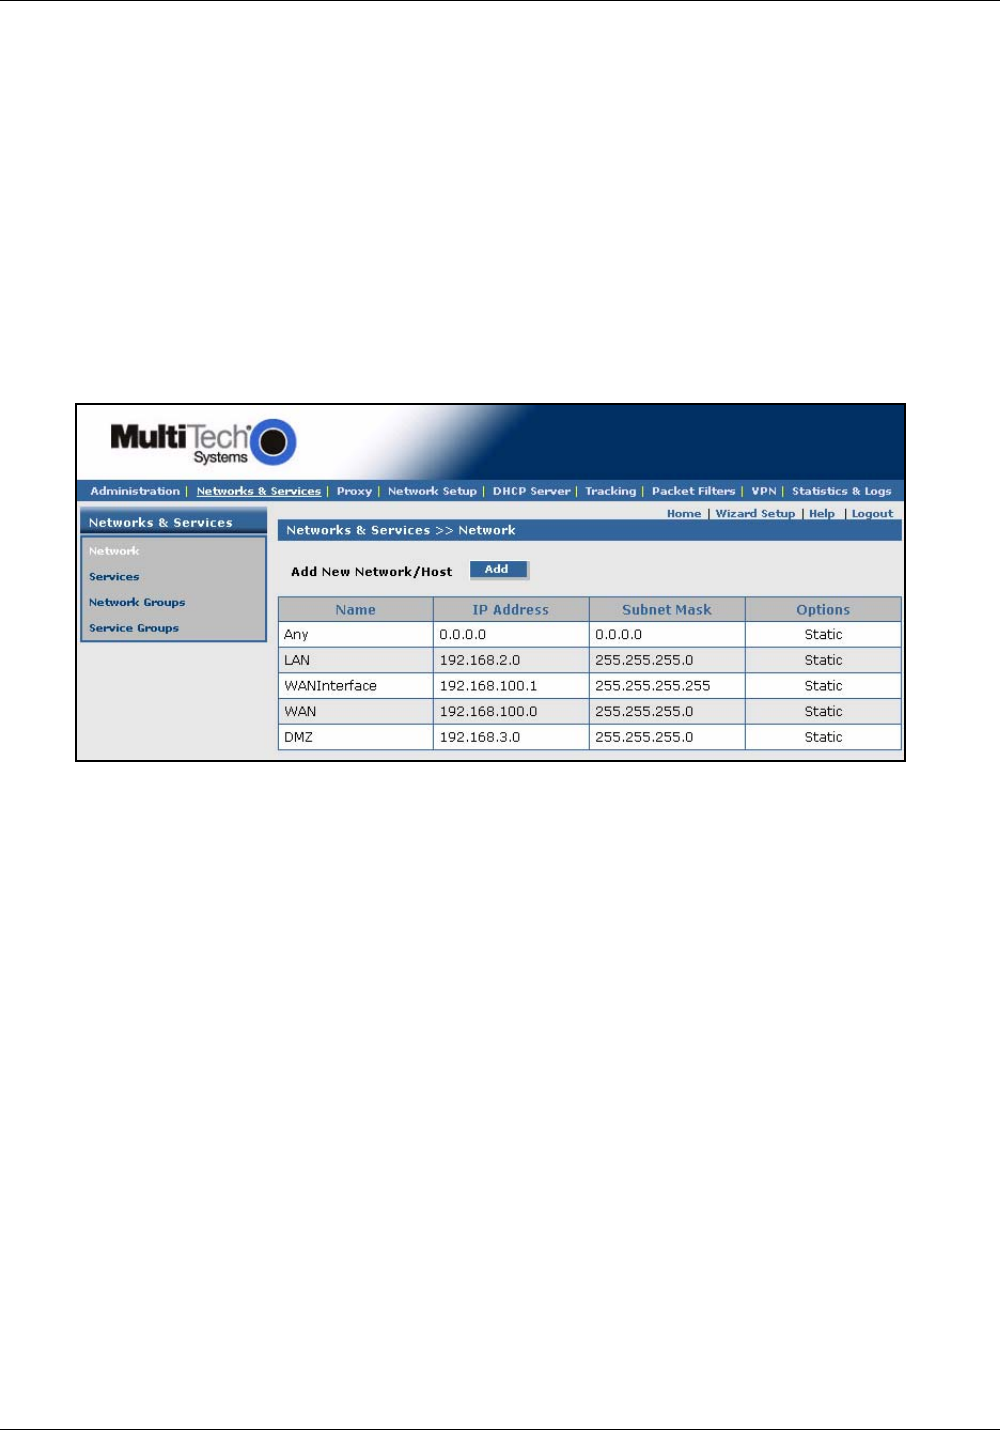
To configure your RouteFinder VPN in the home office in preparation for connection to a remote branch office, click the
Networks & Services button on the Menu bar, and then select Networks. Set the following:
1. Add a network for the remote LAN port (private LAN on eth0 at the branch office). Enter the following:
• Name = RemoteLAN
• IP address = 192.168.10.0
• Subnet mask = 255.255.255.0
2. Add a network for the remote WAN port (public WAN on eth1 at the branch office). Enter the following:
• Name = RemoteWAN_IP
• IP address = 204.26.122.3
• Subnet mask = 255.255.255.255
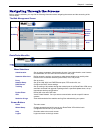
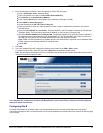
Example 1 will add two network entries to the table on this screen:
Name IP Address Subnet Mask Options
RemoteLAN 192.168.10.0 255.255.255.0 Edit | Delete
RemoteWAN_IP 204.26.122.3 255.255.255.255 Edit | Delete
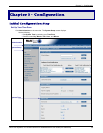
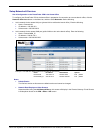
Notes:
• Default Entries
The first four entries on this screen are default entries and cannot be changed.
• Network Data Displays on Other Screens
Networks added using the Add Network/Host on this screen will display in the Remote Gateway IP and Remote
LAN dropdown boxes on the VPN > IPSec > IKE screen.