


ST-94112N page 2 of 4
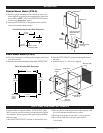
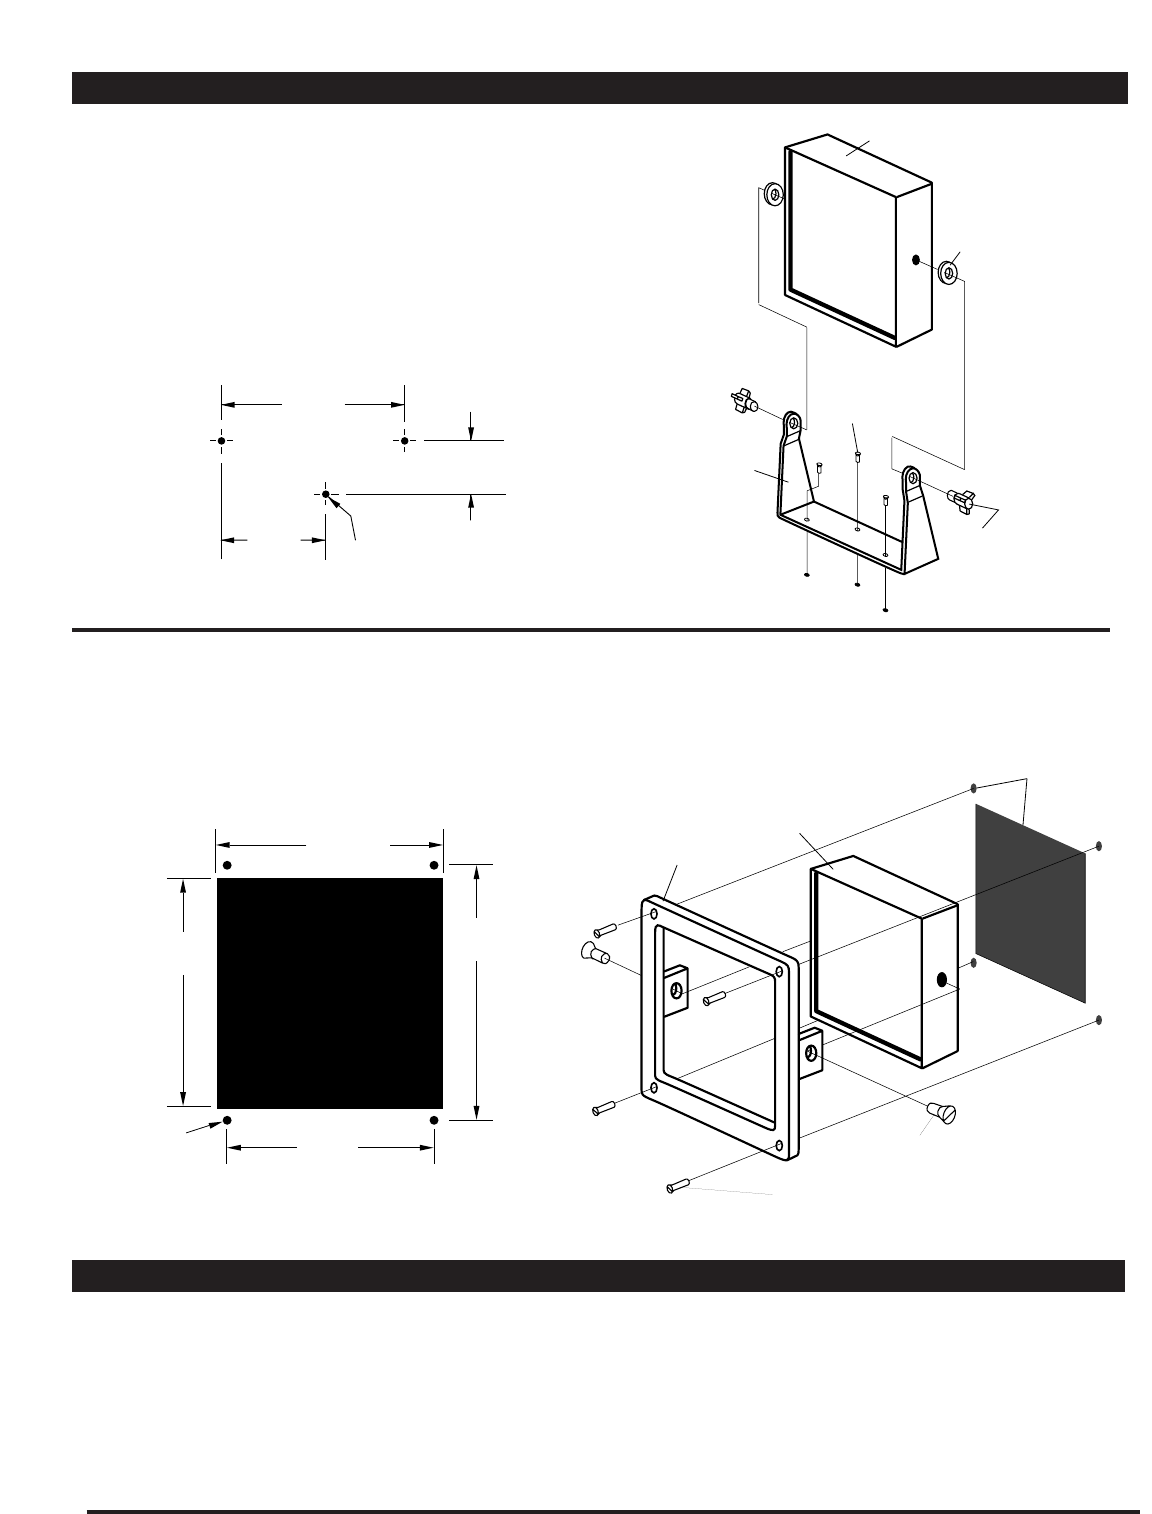
MOUNTING
1. Cut a hole in the panel according to the mounting hole dimen-
sions shown below.
2. Install the flush mount mounting bracket on the TATTLETALE
®
.
3. Insert the TATTLETALE
®
into the hole through the front of
the panel.
4. Install the four 6-32 x 5/8 screws supplied.
Flushmount
Bracket
Mounting
Screws (4)
Bracket Mounting
Screws (2)
TATTLETALE
®
Mounting Holes
Gimbal
Bracket
Washers (2)
Mounting Bracket
Knobs (2)
Customer Supplied
Bracket Mounting
Screws (3)
TATTLETALE
®
3-1/2 in.
(89 mm)
1 in.
(25 mm)
1-3/4 in.
(44 mm)
9/64 in. (4 mm)
diameter 3 places
5-5/16 in.
(135 mm)
4-11/16 in.
(119 mm)
5/32 in.
(4 mm)
Typical
4 places
5-3/4 in.
(146 mm)
5-3/8 in.
(137 mm)
1. Install the gimbal mounting bracket with three screws (cus-
tomer supplied) according to the mounting hole dimensions
shown below. NOTE: Verify the TATTLETALE
®
s rotation
clearance (see Dimensions, page 1).
2. Attach the TATTLETALE
®
to the gimbal bracket with the
washer and mounting bracket knobs.
APPLYING PREPRINTED LABELS
Preprinted label are supplied with the TATTLETALE
®
. These
labels are precut, pressure sensitive and when properly applied
are permanent. To insure proper label application perform the
following steps:
1. Be sure the TATTLETALE
®
s faceplate is clean and free of oil.
Gimbal Mounting Bracket Hole Dimensions
Panel Mounting Hole Dimensions
2. Peel one label at a time and position on the faceplate in the
box which matches the input sensor position.
3. Before pressing down, be sure label is correctly placed.
4. Press firmly on the label, and leave untouched for
several hours.
Panel Mount Model (ST8-F)
Gimbal Mount Model (ST8-G)