


4. Connect the D-SUB ( or the appropriate connector) end of the
video cable supplied with the graphics card to the connector
of the video card.
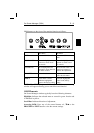
5. Connect the red BNC cable to the BNC connector on the
monitor labelled “R”. The green BNC cable should be
connected to the BNC connector on the monitor labelled “G”.
The blue BNC cable should be connected to the BNC
connector on the monitor labelled “B”. If you have a fourth
BNC connector (composite SYNC.) connect it to the BNC
connector on the monitor labelled “HS/CS”. If you have a
fifth BNC connector (vertical SYNC.) connect it to the BNC
connector on the monitor labelled “VS”.
6. Connect one end of the power cable to the MultiSync P1150
monitor and the other end to the power outlet.
7. Turn on the monitor and computer.
8. This completes the installation.
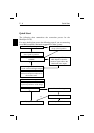
NOTE: If you have any problems, please refer to the section “Trouble
Shooting”.
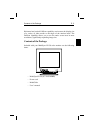
Connection to Two Systems or Video Cards (ie. an IBM
and a Macintosh system)
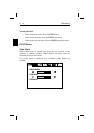
The MultiSync P1150 monitor was designed to support connection to
two systems or video cards simultaneously. This feature allows you to
use one monitor for two systems and easily select between the two with
the front panel BNC/D-SUB switch.
This configuration requires one of the systems to be connected using
BNC connectors. If your video card did not come with a BNC cable,
one must be purchased from a local computer store.
To attach the monitor to two systems, follow the instructions below.
1. Follow the installation guidelines for IBM- or Macintosh
computers you find on the pages before, to connect the first
system using the supplied MultiCable. This completes the
installation of the first system.
Connection to Your Personal Computer E - 11