


Configuring Your Wireless Network 25
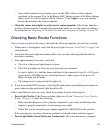
– Then, enter this PIN in the Enter Client’s PIN field provided on the router and click
Next. You have 4 minutes to enable WPS on the router using this method.
Using either method, the client wireless device will attempt to detect the WPS signal from the
router and establish a wireless connection in the time allotted.
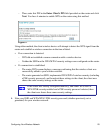
• If no connection is detected:
– WPS did not establish a secure connection with a wireless device.
– Neither the SSID nor the WPA/WPA2 security settings were configured on the router.
• If a connection is established:
– The router WPS screen displays a message confirming that the wireless client was
successfully added to your wireless network.
– The router generated an SSID, implemented WPA/WPA2 wireless security (including
a PSK security password), and broadcast these settings to the client; the client now
shares the same security settings as the router.
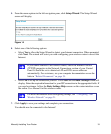
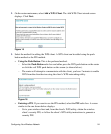
4. Note your SSID and WPA/WPA2 PSK security password (whether previously set or
generated) for your wireless network.
Figure 17
If the router was already configured manually, and either WPS/PSK or
WPA2/PSK security enabled and a PSK security password selected, then
the client now shares these same security settings.