


Making the Physical Connections 3-1
CC
CC
hh
hh
aa
aa
pp
pp
tt
tt
ee
ee
rr
rr
33
33
MM
MM
aa
aa
kk
kk
ii
ii
nn
nn
gg
gg
tt
tt
hh
hh
ee
ee
PP
PP
hh
hh
yy
yy
ss
ss
ii
ii
cc
cc
aa
aa
ll
ll
CC
CC
oo
oo
nn
nn
nn
nn
ee
ee
cc
cc
tt
tt
ii
ii
oo
oo
nn
nn
ss
ss
This section tells you how to make the physical connections to your Netopia R5000 Series Router. This section
covers the following topics:
■
“Find a location” on page 3-1
■
“What you need” on page 3-2
■
“Connect the router” on page 3-3
■ “Netopia R5000 Series Router status lights” on page 3-5
FF
FF
ii
ii
nn
nn
dd
dd
aa
aa
ll
ll
oo
oo
cc
cc
aa
aa
tt
tt
ii
ii
oo
oo
nn
nn
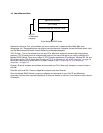
When choosing a location for the Netopia Router, consider:
■ Available space and ease of installation
■ Physical layout of the building and how to best use the physical space available for connecting your Netopia
Router to the LAN
■ Available wiring and jacks
■ Distance from the point of installation to the next device (length of cable or wall wiring)
■ Ease of access to the front of the unit for configuration and monitoring
■ Ease of access to the back of the unit for checking and changing cables
■ Cable length and network size limitations when expanding networks
For small networks, install the Netopia R5000 Series Router near one of the LANs. For large networks, you can
install the Netopia R5000 Series Router in a wiring closet or a central network administration site.