7
En
Number of Devices That Can Be Set
•
The PD-10 can store the Profile Information
of up to 50 cameras. If 50 profiles have al-
ready been created, the oldest profile will
be deleted when storing a new profile.
•
The camera can store the Profile Informa-
tion of up to 9 devices, such as the PD-10,
computers, and printers connected to com-
puters. If 9 profiles have already been cre-
ated and the Profile Information of the
PD-10 is stored, delete an unneeded profile
first using the Wireless Camera Setup Utili-
ty provided with the camera. If an unneed-
ed profile is not deleted, the oldest profile
will be overwritten. See the camera manual
for more information on deleting profiles.
Profile names
• When the Profile Information of the
PD-10 is stored in the camera, the pro-
file name is automatically set to “Printer
x” (where x is a digit from 1 to 9).
•
The profile name “Printer
x
” can be
changed later using the Wireless Camera
Setup Utility provided with the camera. See
the camera manual for more information.
Turning the PD-10 Off
• The PD-10 will turn off when discon-
nected from the printer.
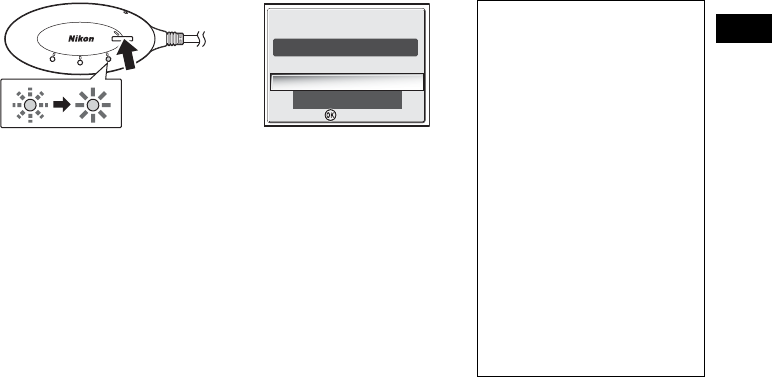
4
As soon as the message is dis-
played, press the START button on
the PD-10 for two seconds.
• Press the START button while the mes-
sage is displayed.
• The BUSY lamp on the PD-10 will blink
slowly in orange 1. After a while, the
BUSY lamp will light in orange for about
three seconds when setup is complete
2.
5
After setup is complete, the mes-
sage “Ready to connect to
Printer1 Do you want to connect
now?” will be displayed on the
camera monitor.
•
Select
No
to return to the CHOOSE PRO-
FILE screen (
c
6). Select
Yes
to continue
operations and print (step 3 on
c
8).
•
After Profile Information is set up, the
camera and PD-10 can be connected any
number of times by choosing the Profile In-
formation from the camera CHOOSE PRO-
FILE screen. Profile Information must be set
up again when Reset (
c
10) is performed.
Note
If setup fails, the BUSY lamp on the PD-10 will blink rapidly in orange, and a message will be dis-
played on the camera monitor. If this occurs, press the d button on the camera, and perform set-
tings again.
LINK
B
U
S
Y
S
T
A
R
T
P
O
W
E
R
12
Yes
Ready to connect toReady to connect to
No
Printer1
Do you want to connect now?
Do you want to connect now?
Confirm
Confirm


