


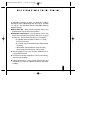
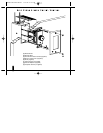
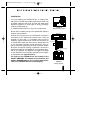
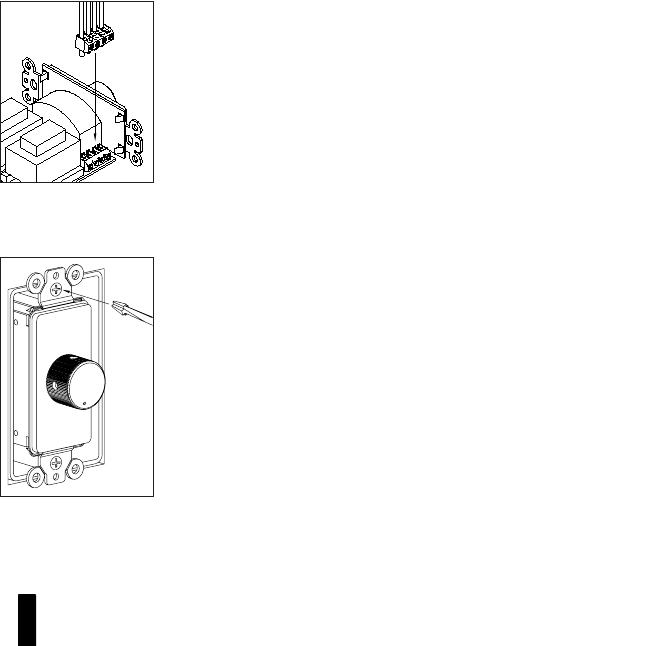
4. Plug the connectors into the VCS-2D-HP as shown in
(Figure 5)
5. Secure the VCS-2D-HP to the electrical box or p-ring.
Insert the 1
1/4” long device screws into the oblong-shaped
screw holes on the top and bottom of the VCS-2D-HP.
Note that the oblong shape of the screw holes allow you to
position the VCS-2D-HP so that it is vertical. Position the
VCS-2D-HP so that the screws are aligned with the thread-
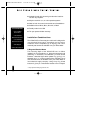
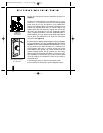
ed holes in the electrical box or p-ring. Tighten the screws
using a phillips screwdriver. DO NOT OVER-TIGHTEN. In
some instances, you may need to loosen these screws several
turns to allow the VCS-2D-HP to fit flush with the Decora
cover plate. See (Figure 6).
6. Use the shorter plate screws to fasten the Decora faceplate
to the VCS-2D-HP. DO NOT OVER-TIGHTEN THE PLATE
SCREWS OR YOU MAY DAMAGE THE FACEPLATE. Line up
all the screws in the same direction for a finished look.
NOTE: Certain “old work” or “retro-fit” boxes, such as the
Carlon B225R, have a plastic “lip” which interferes with the
Decora faceplate screws. This lip prevents you from being
able to tighten these screws completely. To make the clear-
ance necessary for these screws, you must remove the parts
of the lip causing the interference. There are two ways to
accomplish this:
1. Drill through the lip of the box at the screw points.
2. Cut notches into the lip with a pair of diagonal cutters.
9
HH
II GG HH
PP
OO WW EE RR
SS
TT EE RR EE OO
VV
OO LL UU MM EE
CC
OO NN TT RR OO LL
Figure 6
Loosening the Screws
for a Flush Fit
Figure 5
Installing the
Connectors
DS00134A/VCS-2D-HP 2/4/99 4:10 PM Page 3