


18
To Partially Erase a File
You can erase a selected part of a file.
1
Press the FOLDER/MENU button to
choose a folder.
2
Press the FF/+ or REW/– button
several times to choose the file into
which you want to erase a part.
3
Press the PLAY button to play the
file.
4
Press the PLAY button once again
where you want to start erasing.
The recorder pauses.
5
Press the ERASE button.
The recorder starts playback automatically,
and the display shows the total recording
time of the file being played and “ERASE”
alternately.
6
Press the ERASE button once again
where you want to stop erasing.
The erase starting point (time) set in step
3 and the ending point (time) set in this step
appear on the display for 8 seconds
alternately.
7
Press the ERASE button once
again.
When “ERASE DONE” appears after
“PARTIAL ERASE! ”, partial erasing is
completed.
Notes
• When the recorder finishes playback of the current track
before you press the ERASE button, the erase starting point
(time) and ending point (time) alternate on the display for 8
seconds, similar to Step 6.
• Locked files cannot be erased (☞ P.19).
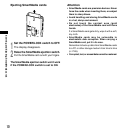
• A SmartMedia card with a write-protect seal attached to it
cannot be erased (☞ P.4).
Using the Variable
Control Voice Actuator
(VCVA)
When the microphone senses that sounds
have reached a preset volume, the built-in
Variable Control Voice Actuator (VCVA) starts
recording automatically, and stops when the
volume drops.
Particularly helpful for extended recording, the
VCVA not only conserves memory by turning
off recording during silent periods, but also
makes playback more efficient and convenient.
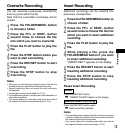
1
Start recording with the VCVA
switch set to ON.
When the volume falls to a preset level or
lower, recording automatically pauses, and
“STANDBY VCVA” flashes on the display.
The record/play lamp glows when recording
starts and flashes when recording pauses.
2
Using the VOLUME control, adjust
the start/stop actuation level.
The higher the VOLUME control is set, the
more sensitive the start/stop level
becomes, allowing recording to
automatically begin at a quieter level.
Notes
• The start/stop actuation level also varies depending on the
selected microphone sensitivity mode (☞ P.14).
• To ensure successful recordings, prior testing and
adjustment of the start/stop actuation level is recommended.
Using the Variable Control Voice Actuator
Erasing