


5
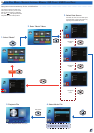
co n n e c t co m p u t e r f o r Da t a tr a n S f e r
5
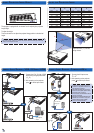
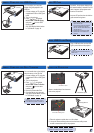
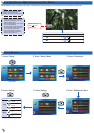
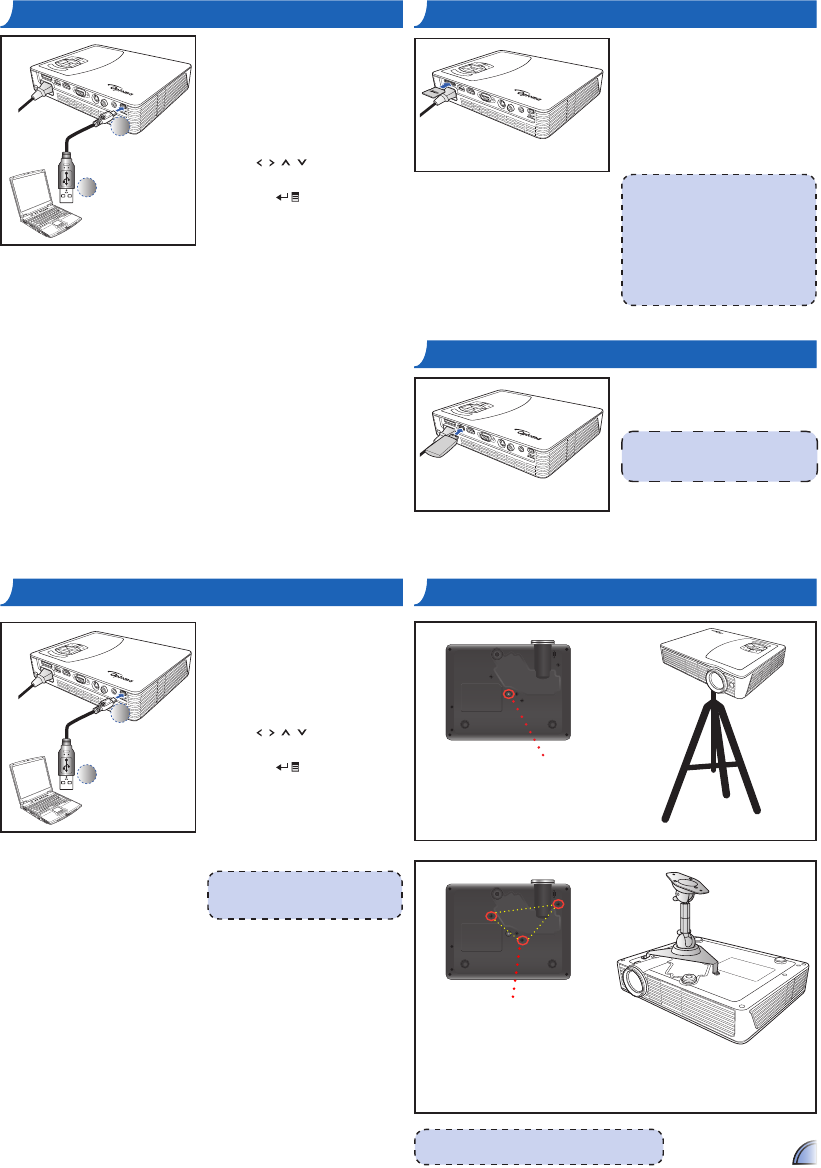
mo u n t t h e pr o j e c t o r
2
1
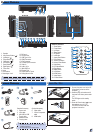
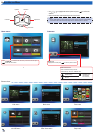
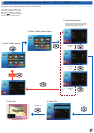
You can transfer data to the projector
internal memory or the SD card.
1. Connect a laptop or PC using the
supplied mini-USB to USB Type-A
cable.
2. Turn on the projector.
3. Press
/ / / to highlight
mini-USB > Data Transfer
and press to enter data
transfer mode.
4. Browse for Removable Disk.
5.Copythelestoyourcomputer.
See "Data Transfer Mode" section
in "USB Mode" on page 18.
<Note>
The laptop/PC can only detect the input
source when the projector is switched on.
<Note>
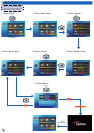
The tripod and ceiling mount are optional accessories.
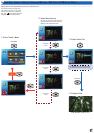
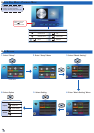
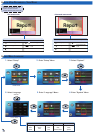
In S e r t SD ca r D
In S e r t uSB fl a S h Dr I v e
L
O
C
K
By default, the projector displays from
the internal memory. However if an SD
card is inserted, the projector reads
fromtheSDcardrst.
Insert an SD card into the slot with the
gold contacts facing down.
<Note>
To remove the SD card, push the card to •
eject it from the slot.
Do not remove the SD card while the •
projector is projecting image from
the card. This can cause data loss or
damage the card.
Supports SD card size up to 32GB.•
The SD card is not included in the •
package.
PlugaUSBashdriveintotheUSB
Type A port at the back of projector.
<Note>
SupportUSBashdrivewithFAT32and
NTSF format.
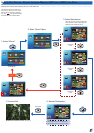
co n n e c t co m p u t e r f o r
uSB DI S p l ay
2
1
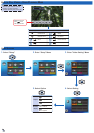
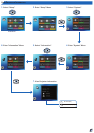
You can project your computer
display using the projector's mini
USB port.
1 Connect a laptop or PC using the
supplied mini-USB to USB Type-A
cable.
2. Turn on the projector.
3. Press
/ / / to highlight
mini-USB > USB Display
and press
to enter USB
display mode.
See "USB Display Mode" section
in "USB Mode" on page 18.
Screw a standard tripod into the screw
hole on the projector.
Screw hole for tripod
*Standard Tripod
1. Placetheprojectorupsidedownonaatsurface.
2. Line up the three mounting holes and use the three ceiling mount
screws to secure the mount to the projector.
Screw holes for ceiling mount
*Ceiling Mount