


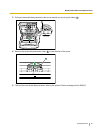
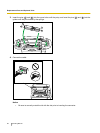
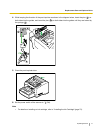
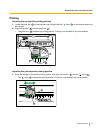


4. While keeping the direction of the post-imprinter as shown in the diagram below, insert the pins (
1
) on
both sides into the guides, and insert the pins (
2
) on both sides into the guides until they are locked by
the springs (
3
).
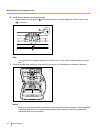
1
2
1
2
3
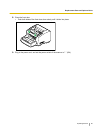
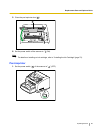
5. Close the post-imprinter door.
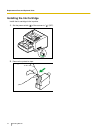
6. Set the power switch of the scanner to " " (ON).
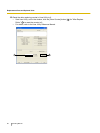
Note
• For details on installing an ink cartridge, refer to "Installing the Ink Cartridge" (page 72).
Operating Manual 71
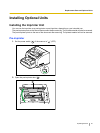
Replacement Parts and Optional Units