


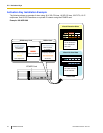


2.1.3 Activation Key File
The
corresponding number of IP CO lines and IP telephones or enhanced features can be activated by installing
the downloaded activation key file(s) in the SD Memory Card of the IPCMPR card using the Maintenance
Console.
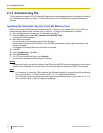
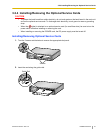
Installing the Activation Key File in the SD Memory Card
Make sure to install the Maintenance Console on the PC in advance, and connect the PC to the PBX. For
details about the Maintenance Console, refer to "Section 4 Guide for the Maintenance Console".
1. Start the Maintenance Console from the Start menu on the PC.
2. From the Utility menu, select File Transfer PC to PBX (SD Card).
A dialog box will be displayed.
3. Select the file to upload.
A window showing the upload progress will be displayed.
While transferring files to the SD memory card, the PBX automatically renames them according to the
header information.
A message will be displayed when the transfer is complete.
4. Click OK.
5. Under Configuration, click Slot.
6. Click Activation Key.
7. For IP Trunk activation key file(s), click Execute.
A confirmation message will be displayed. Click Yes.
Notice
The
activation key file can only be installed in the PBX with the MPR ID number entered when the activation
key file was downloaded. The activation key file cannot be reissued unless the IPCMPR card crashes.
Note
• It is necessary to restart the PBX to activate the Software Upgrade 01 activation key after performing
the procedure above. To restart the PBX, refer to "5.1.4 Using the Reset Button".
• For
information about programming activation keys using the Maintenance Console, refer to "3.3 [1-1]
Slot—Activation Key" in the PC Programming Manual.
44 Installation Manual Document Version 2011-10
2.1.3 Activation Key File