


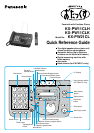
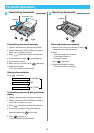
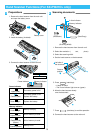
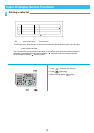

Preparations
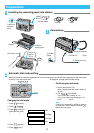
Push up to
open the
cover.
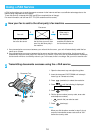
Installing the recording paper and stacker
1
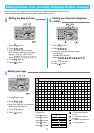
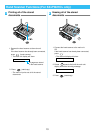
Automatic dial mode setting
3
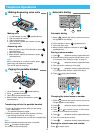
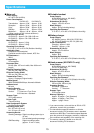
Connections
2
Close the cover.
Thermal paper
Incorrect Slack
Stacker
When the power cord and the telephone line cord are connected, the unit will start detecting the dial mode (tone
or pulse). If you cannot dial and “ ” is displayed, change the dial mode setting.
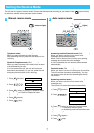
2. Press .
1. Press (function).
3. Press (select) to
select the dial mode
( ).
4. Press (register).
5. Press (stop).
Pulse 20pps
Pulse 10pps
Tone
Auto
Changing the dial mode
1. Set the dial mode to “20”.
(See “Changing the dial mode” shown on
the left.)
2. Dial (time signal).
If you cannot dial, change to “10”.
If you cannot dial after changing to “10”,
set to “ ” (tone).
Confirming the dial mode
Note:
If this unit is connected to a PBX or used as
an extension, dial the access code (ex. )
before the time signal.
2
Approx.
15 cm
click
1
1
1
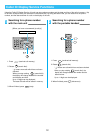
23
456
7
7
7
89
9
0
0
0
Raise the antenna.
To Telephone Line
Connect to “ ” (line).
To Power
Outlet
For B4 size
recording paper