


ENGLISH-17
Getting started
16-ENGLISH
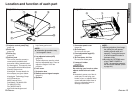
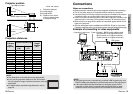
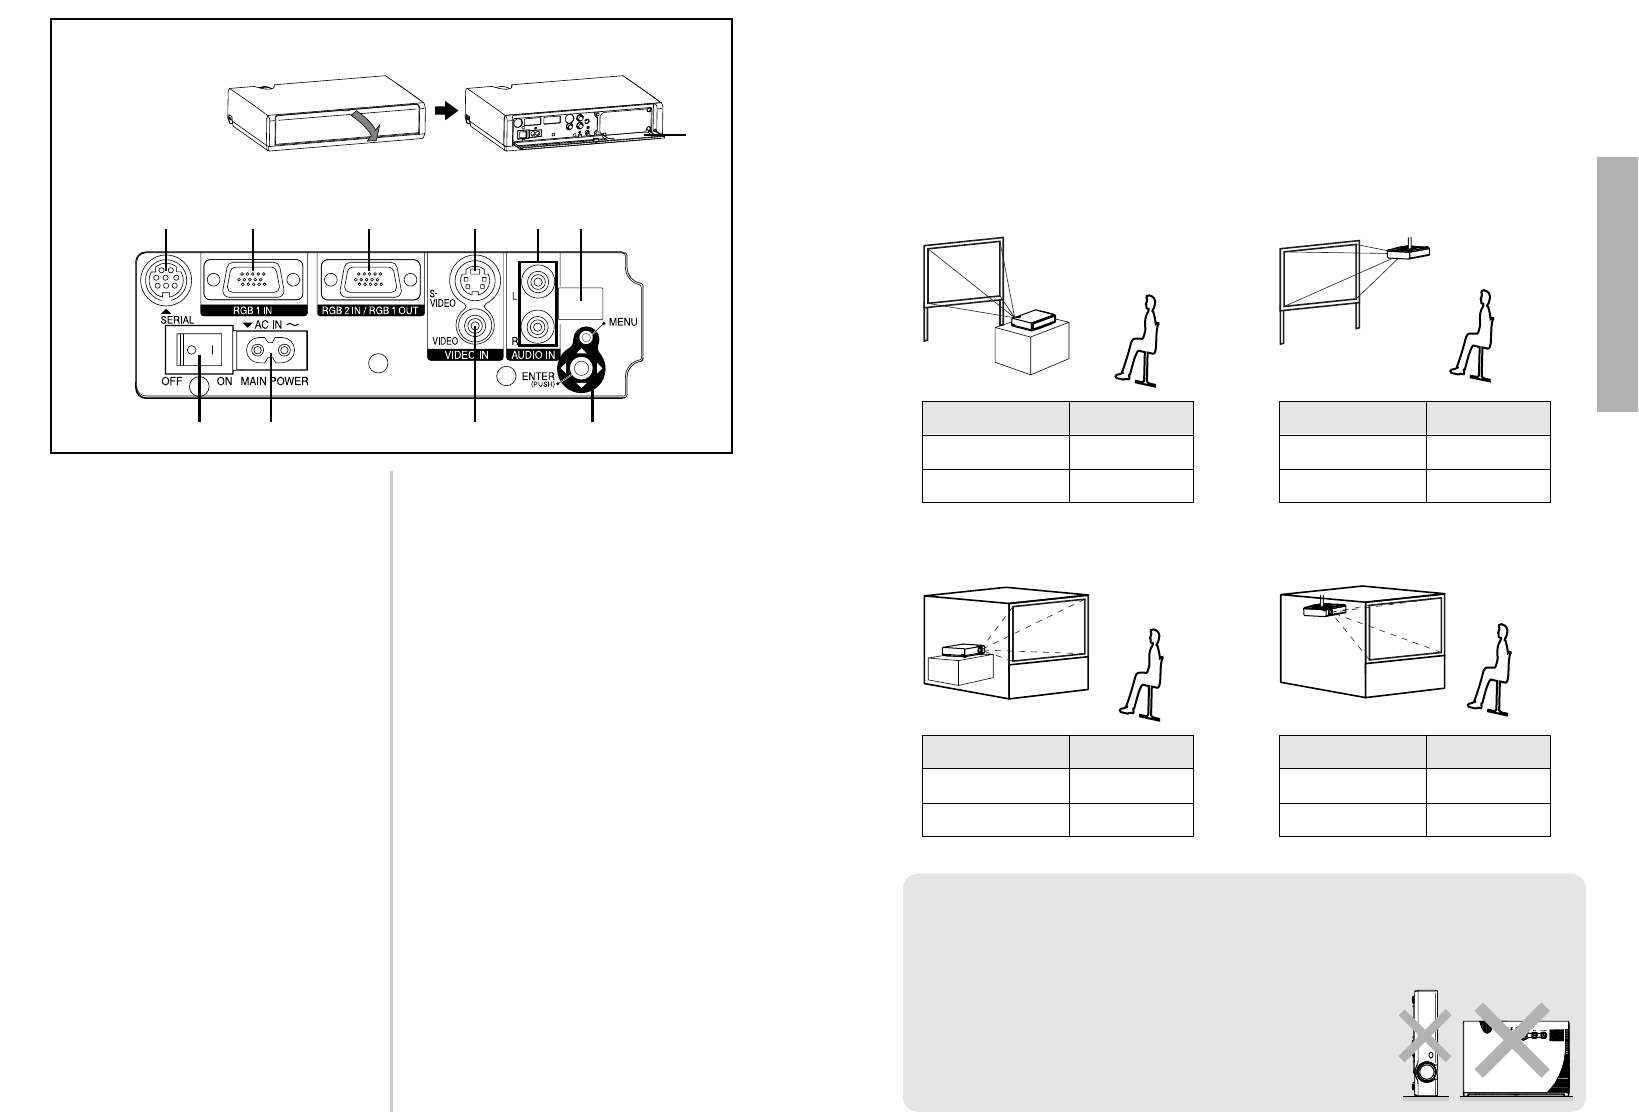
Connector panel
#MAIN POWER switch
(pages 22 and 24)
$Power input socket (AC IN)
(page 22)
The accessory power cord is
connected here.
Do not use any power cord other
than the accessory power cord.
%SERIAL connector
(pages 19, 20 and 60)
This connector is used to connect
a personal computer to the
projector in order to externally
control the projector. (RS-232C
compatible)
&RGB1 IN connector
(pages 19 and 20)
This connector is used to input
RGB signals and YPBPR signals.
'RGB2 IN/RGB1 OUT connector
(pages 19, 20 and 42)
This connector is used to input or
output RGB signals and YP
BPR
signals. Use the RGB2 SELECT
item in the OPTION1 menu to
select whether you want input or
output with this connector.
(S-VIDEO IN connector
(pages 19 and 39)
This connector is used to input
signals from a S-VIDEO-compatible
equipment such as a video deck.
The connector is S1 signal
compatible, and it automatically
switches between 16:9 and 4:3
aspect ratios in accordance with the
type of signal being input.
)VIDEO IN jack
(page 19)
This jack is used to input video
signals from a video equipment
such as a video deck.
*AUDIO IN L-R jacks
(pages 19 and 20)
+Remote control signal receptor
(page 21)
,Menu operation (on connector
panel)
(page 14)
-Remote control unit holder
+*('&%
#$ ) ,
-
How to open
Setting-up
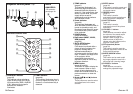
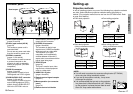
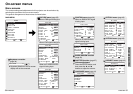
Projection methods
In way of installing projector, any one of the following four projection methods
are used. Select whichever projection method matches the setting-up
method. (The projection method can be set from the OPTION2 menu. Refer
to page 43 for details.)
BFront-desk projection BFront-ceiling projection
BRear-desk projection
(Using a translucent screen)
BRear-ceiling projection
(Using a translucent screen)
Menu items Setting
FRONT
DESK
FRONT/REAR
DESK/CEILING
Menu items Setting
FRONT
CEILING
FRONT/REAR
DESK/CEILING
Menu items Setting
REAR
DESK
FRONT/REAR
DESK/CEILING
Menu items Setting
REAR
CEILING
FRONT/REAR
DESK/CEILING
NOTE:
BYou will need to purchase the separate ceiling bracket (ET-PKC80)
when using the ceiling installation method.
BIf you set up the projector vertically, it may cause
to damage the projector.
BIt is recommended that you set up the projector
in a place that is tilted at less than
±30°. Setting
up the projector in places that are tilted at more
than
±30° may cause malfunctions.