Maintenance
Care and Replacement
ENGLISH - 44
J Replacement procedure
Q Removing and replacing the lamp unit
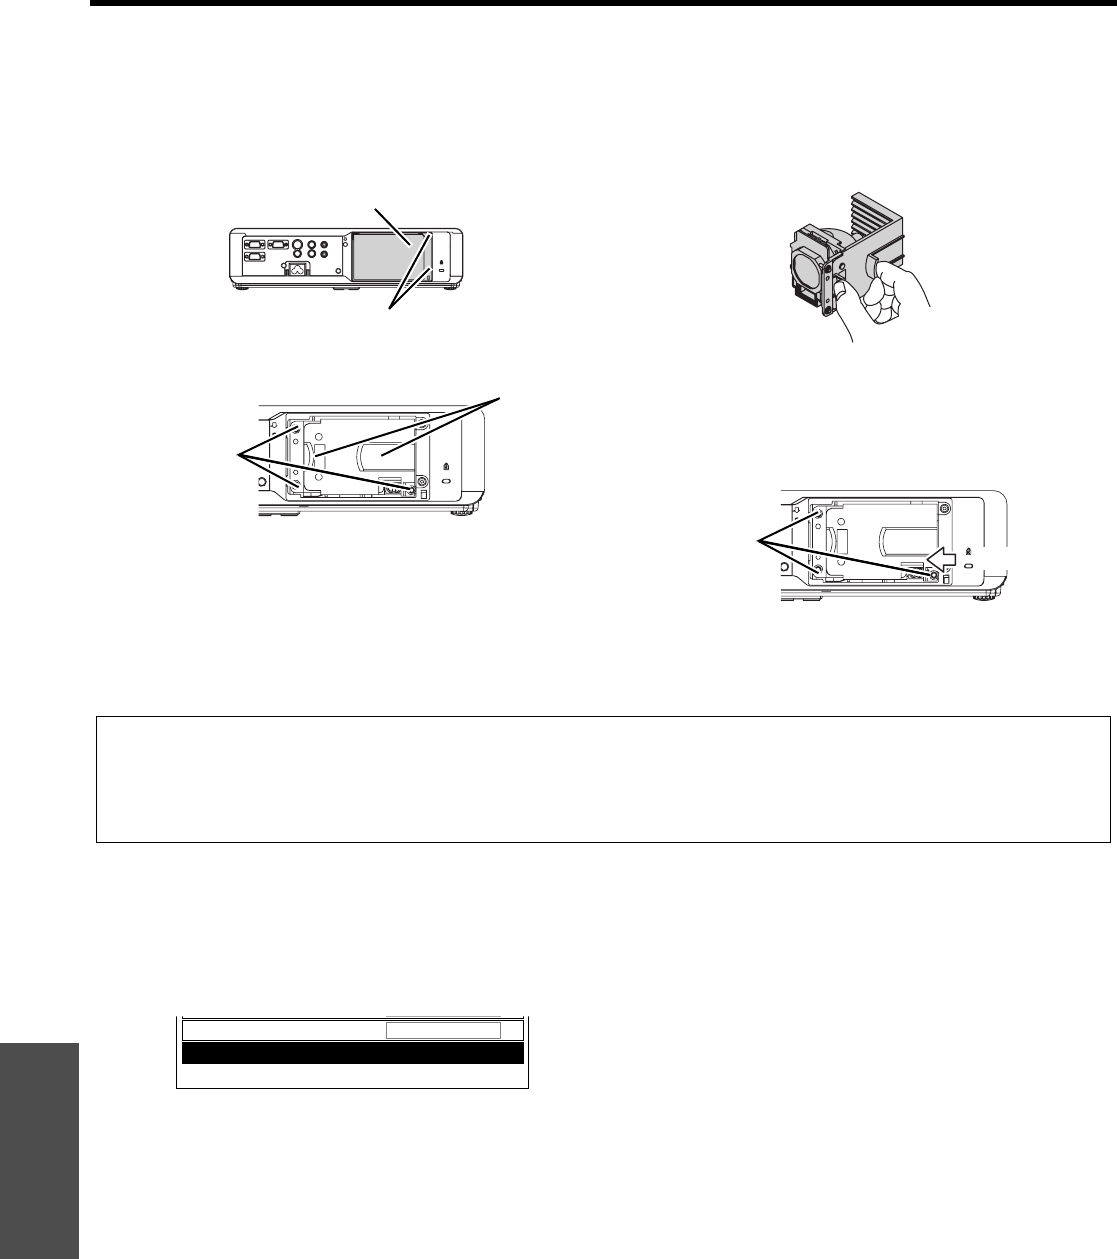
1. Use a Phillips-head screwdriver to loosen the 2
lamp unit cover fixing screws on the back of the
projector until the screws turn freely, and remove
the lamp unit cover.
2. Use a Phillips-head screwdriver to loosen the 3
lamp unit fixing screws.
3. Pull the used lamp unit gently from the projector.
Grip the handle and keep the lamp unit paralleled
when you remove the lamp. Some parts of the lamp
unit are sharpened and may cause injury.
4. Replace the new lamp unit in correct direction.
5. Press in the lamp unit until it clicks and make sure
the unit is installed securely.
6. Tighten the 3 lamp unit fixing screws securely with
a Phillips-head screwdriver.
7. Attach the lamp unit cover and tighten the 2 lamp
unit cover fixing screws securely with a Phillips-
head screwdriver.
Q Resetting the LAMP RUNTIME
1. Connect the mains lead to a mains socket, and
switch on the projector.
2. Press the MENU button to display the menu.
3. Press F G to select OPTION and press ENTER.
4. Press F G to select LAMP RUNTIME.
5. Press and hold the ENTER button for
approximately 3 seconds.
6. The confirmation screen will be displayed and
select OK.
7. Reset the projector by unplugging and plug again
the mains lead.
8. Display the LAMP RUNTIME menu again and
confirm the duration of time is reset to “0 H”.
Lamp unit cover fixing screws
Lamp unit cover
Handles
Lamp unit
fixing screws
Lamp unit
fixing screws
Press here
NOTE:
• Be sure to install the lamp unit and attach the lamp unit cover securely. If they are not installed securely, it may cause the
protection circuit to operate so that the power cannot be turned on.
• Do not switch the power on while the lamp unit cover removed.
• Handle the lamp unit with special care as that is a glass product. Dropping or giving a shock may cause burst or damage.
LOW
NORMAL
1820H
LAMP POWER
ALTITUDE
LAMP RUNTIME


