2
3000-A2-GZ41-50
July 1999
Installing the Rear Connector Plate
Prior to installation, check the rear connector plate and V.35 adapter for damage.
If either is damaged, report this immediately to your shipper and your service
representative.
!
HANDLING PRECAUTIONS FOR
STATIC-SENSITIVE DEVICES
This product is designed to protect sensitive components from
damage due to electrostatic discharge (ESD) during normal operation.
When performing installation procedures, however, take proper static
control precautions to prevent damage to equipment. If you are not
sure of the proper static control precautions, contact your nearest
sales or service representative.
To install a DSU and its rear connector plate for the first time:
" Procedure
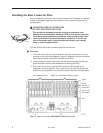
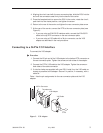
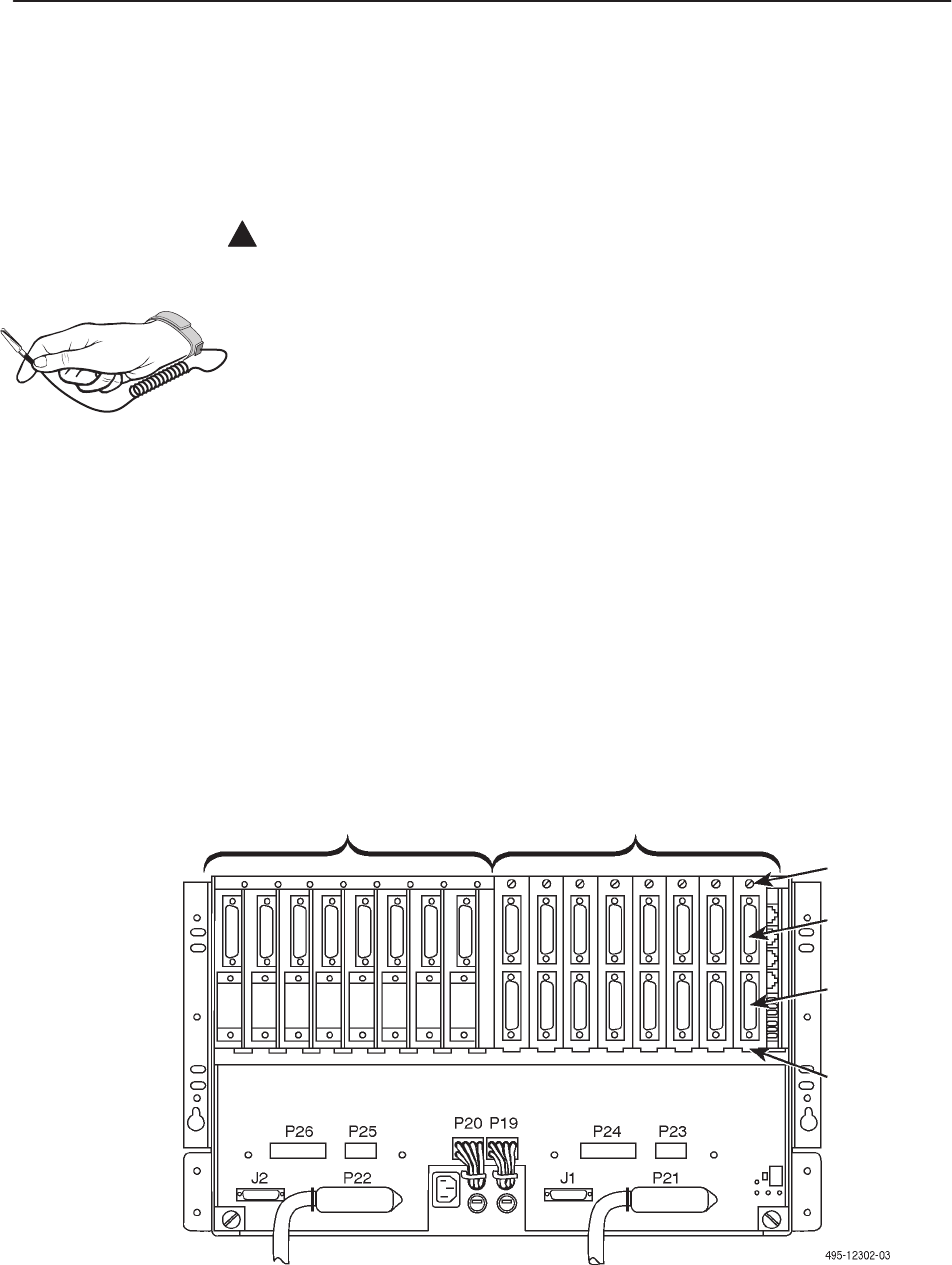
1. At the rear of the carrier, set the tab on the rear connector plate into one of
the slots on the carrier’s backplane (Figure 2). Make sure the rear connector
plate uses the same slot position intended for the DSU.
2. Loosely fasten the screw attached to the rear connector plate, allowing for
slight adjustment that may be needed when installing the DSU.
3. At the front of the carrier, hold the DSU vertically with the latch on its
faceplate in the open position. Then, insert the circuit card into the top and
bottom circuit card guides for the slot that contains the rear connector plate.
Slot
25-Pin V.35
Connectors
25-Pin
EIA-232-D
Connectors
Screw
Non-Modular Devices Model 3511 DSU Rear Connector Plates
Figure 2. Rear View of the COMSPHERE 3000 Series Carrier
496-15104


