


4
SmartWare GUI Quick Start Guide
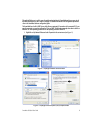
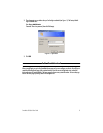
2.
Double-click on
Local Area Connection
and click on
Properties
to open the
Internet Protocol (TCP/IP)
Properties
window (see
figure 2
).
3.
Select
Obtain an IP address automatically
and
Obtain DNS server address automatically
options.
4.
Click
OK
to save changes and close the properties windows.
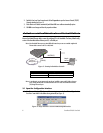
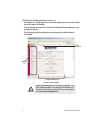
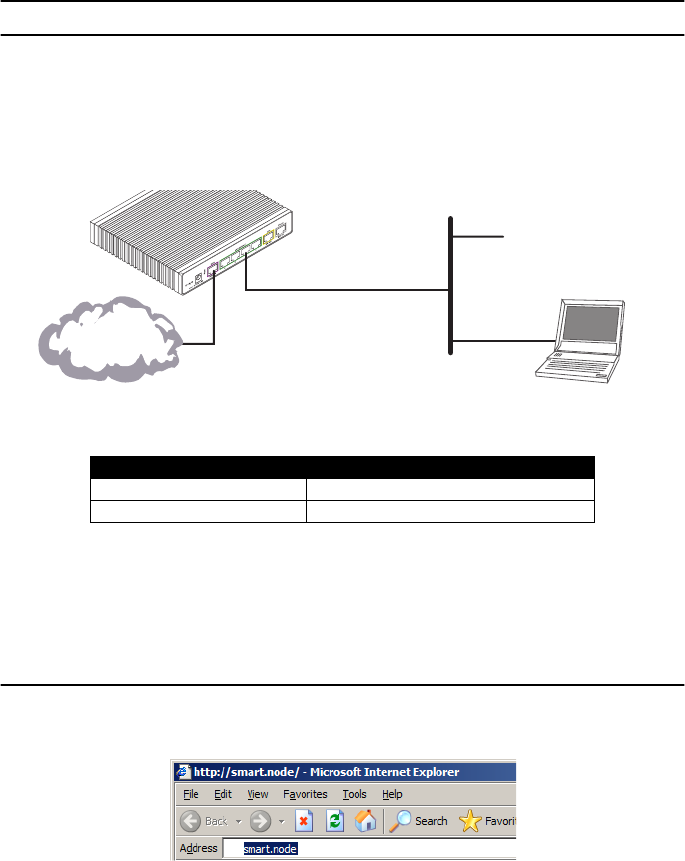
3.0 Connect the PC to the SmartNode LAN Port
Now use the included Ethernet cable to connect the configured PC to the SmartNode. The factory default config-
uration of the SmartNode defines Ethernet port 0/1 as the LAN port.
Note
Most SmartNode Ethernet ports are Auto-MDIX which means that you can use a standard straight-wired
Ethernet cable to connect to the PC or a hub/switch.
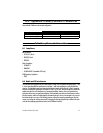
Figure 3.
Connecting the SmartNode to the network
Note
As an alternative, you can connect to the console port (available on most models). Refer to the appro-
priate “Getting Started Guide” for detailed instructions on how to access the command line interface
(CLI) through the console port.
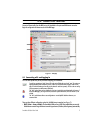
3.1 Open the Configuration Interface
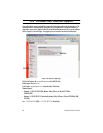
1.
Once IP connectivity is established, use a web browser to get access to the SmartNode configuration inter-
face. Enter “smart.node” in the address bar to get started (see
figure 4
).
Figure 4.
Using a web browser to access the SmartNode configuration interface
Model
Connect to port
SN1200/1400
ETH 0/1, use crossover cable or hub
SN4552
ETH 0/1 any one of the 4 ports, Auto-MDIX
LAN (ETH 0/1)
Network
interface
PC
LAN
Internet or
WAN (optional)
WAN
(ETH 0/0)