Connecting the SmartNode to the network 30
SmartNode 4630 User Manual 4 • Initial configuration
Now you can set your IP address and network mask for the interface ETH 0/0 (WAN). Within this example a
network 172.16.1.0/24 address is assumed. The IP address in this example is set to 172.16.1.99 (you should
set this the IP address given to you by your network provider).
192.168.1.1(ctx-ip)[router]#interface eth0
192.168.1.1(if-ip)[eth0]#ipaddress 172.16.1.99 255.255.255.0
2002-10-29T00:09:40 : LOGINFO : Link down on interface eth0.
2002-10-29T00:09:40 : LOGINFO : Link up on interface eth0.
172.16.1.99(if-ip)[eth0]#
Copy this modified configuration to your new start-up configuration. This will store your changes in non-vol-
atile memory. Upon the next start-up the system will initialize itself using the modified configuration.
172.16.1.99(if-ip)[eth0]#copy running-config startup-config
172.16.1.99(if-ip)[eth0]#
The SmartNode can now be connected to your network.
Connecting the SmartNode to the network
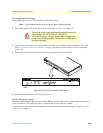
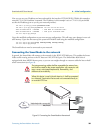
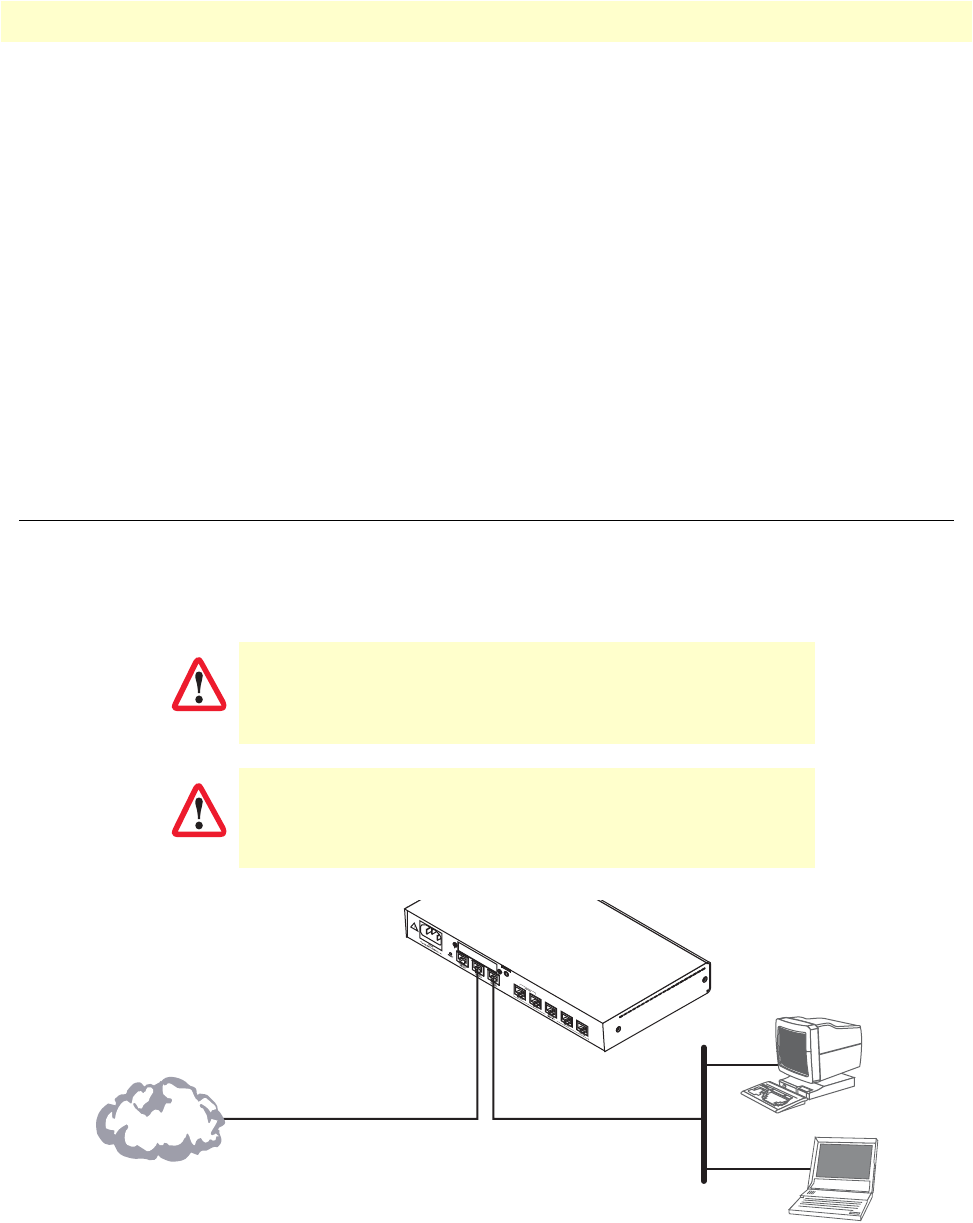
In general, the SmartNode will connect to the network via the WAN (ETH 0/0) port. This enables the Smart-
Node to offer routing services to the PC hosts on LAN (ETH 0/1) port. The SmartNode 4630 Series is
equipped with Auto-MDX Ethernet ports, so you can use straight-through or crossover cables for host or hub/
switch connections (see figure 8).
Figure 8. Connecting the SmartNode to the network
The interconnecting cables shall be acceptable for external use
and shall be rated for the proper application with respect to volt-
age, current, anticipated temperature, flammability, and
mechanical serviceability.
When this device is used in North America, it shall be connected
to a Network Termination Device and not connected directly to
an outside POTS line.
CAUTION
CAUTION
Straight-through wired or crossover cable
LAN (ETH 0/1)
LAN
WAN (ETH 0/0)
Network


