


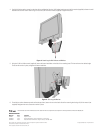
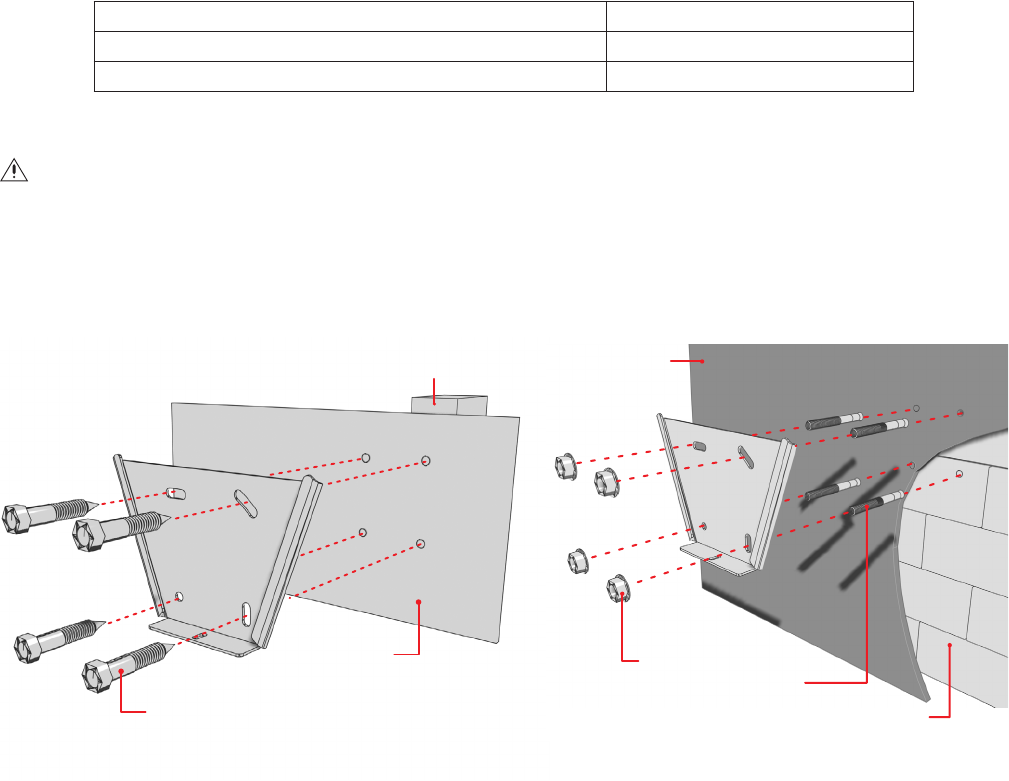
3. Attach the wall bracket to the wall with the short side pointing down. Mounting hardware is not supplied.
a. If installing the mount to a wood stud wall, the stud must be at least 2 inches x 4 inches with a maximum 0.5-inch thick layer of wallboard or
plywood. Use the following steps to attach the mount to a wood stud wall:
(1) Use a stud finder to locate and mark the edges of the wood stud that the mount will be attached to.
(2) Center two of the wall bracket mounting holes vertically between the edges of the wood stud. Use the wall bracket as a template to mark
the two mounting holes.
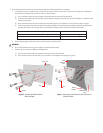
(3) Attach the wall bracket to the wall and through the wood stud using two 1/4-inch diameter x 2-inch lag bolts as shown in Figure 2.
(4) Finish mounting the wall bracket to the wall. Insert hardware suitable for the mounting surface through the remaining two wall bracket
mounting holes. Refer to the following chart for recommended installation surfaces and minimal hardware requirements.
b. Use the following steps to attach the mount to a solid concrete or cinder block wall:
(1) Level and use the wall bracket as a template to mark the mounting holes on the wall.
(2) Attach the wall bracket to the wall using 1/4-inch diameter x 2-inch wedge anchors as shown in Figure 3.
Recommended Mounting Surface Recommended Hardware
Minimum 2-inch x 4-inch wood stud with maximum 0.5-inch thick wallboard Two 1/4-inch diameter x 2-inch toggle bolts
Minimum 2-inch x 4-inch wood stud with maximum 0.5-inch thick plywood Two 1/4-inch diameter x 2-inch lag bolts
WARNING:
• Do not install hardware into mortar joints in filled or non-filled cinder block walls.
• Concrete must be a minimum of 3600 psi or 25 Mpa density.
WOOD STUD
WALL
LAG BOLT
Figure 3. Attaching the Wall Bracket to Solid Concrete or
Cinderblock Wall
NUT
WEDGE
ANCHOR
SOLID
CONCRETE
WALL
CINDERBLOCK
WALL
Figure 2. Attaching the Wall Bracket to
Wood Stud Wall