


Form No. Z2283
Rev. 06.14.10
8300 West Good Hope Road • Milwaukee, WI 53223 • Phone 414-353-7060 • Fax 414-353-7069
Toll Free 800-558-5592 • E-Mail: Perlick@Perlick.com • www.Perlick.com
Perlick is committed to continuous improvement. Therefore, we reserve the right to change specifications without prior notice.
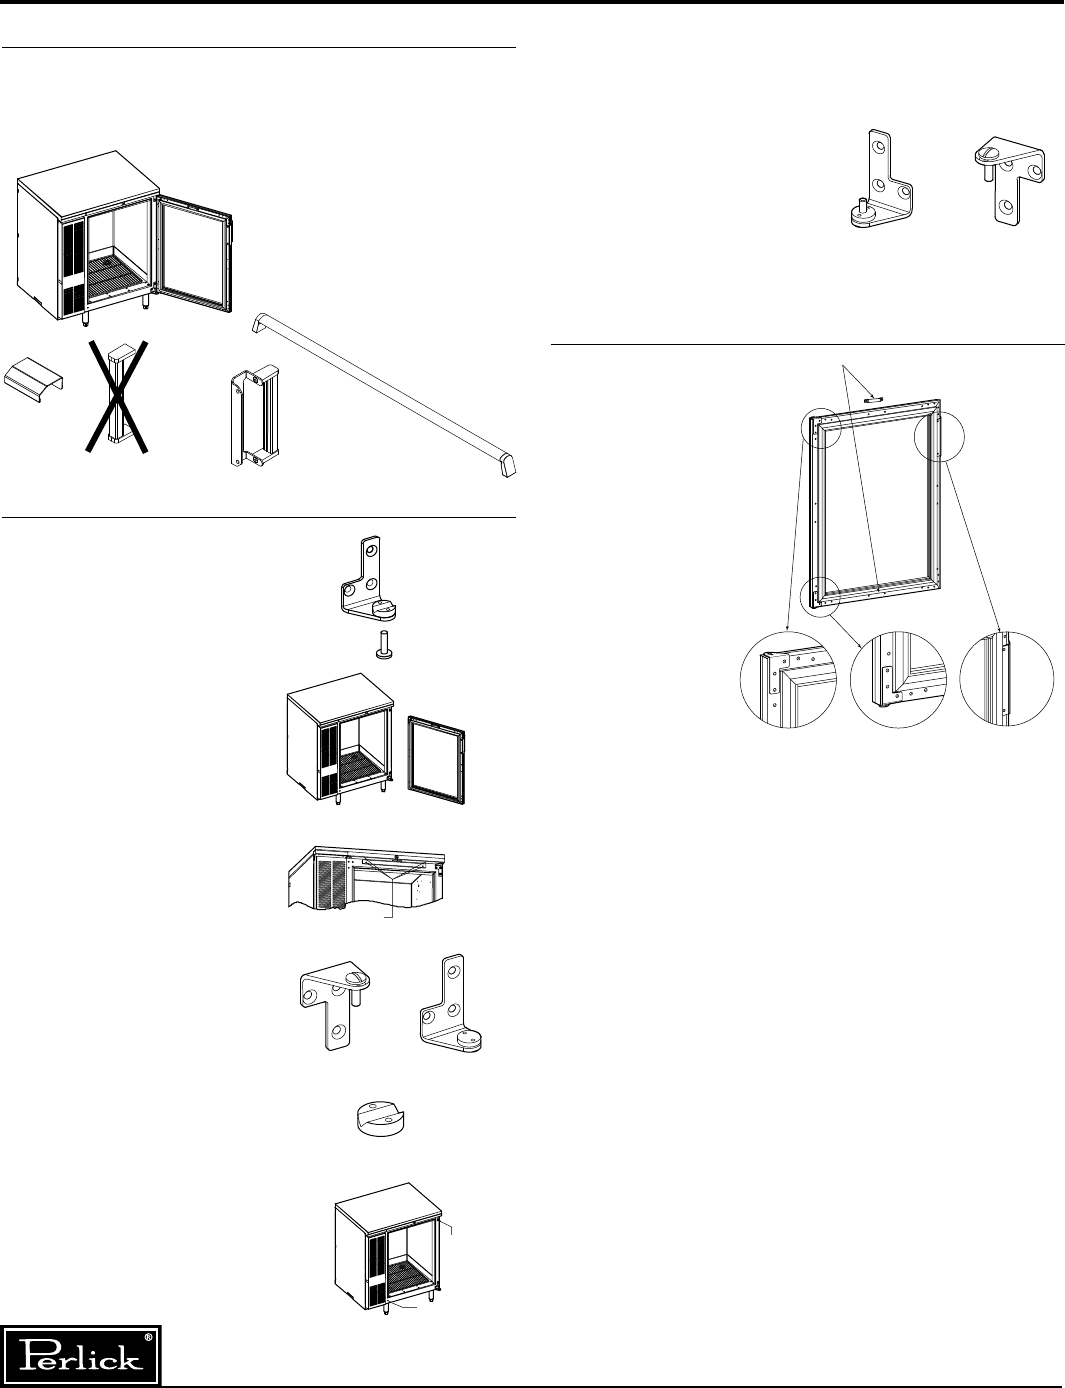
Reversing Door Hinge
12
Tools Required
■
#3 Phillips Screwdriver.
■
1
/
16
” Allen Wrench.
■
Flathead Screwdriver
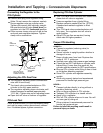
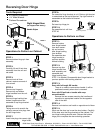
Right Hinged Door
(as shipped from factory)
Operations to Perform on Cabinet
STEP 1:
Remove bottom hinge pin from
assembly.
STEP 2:
Carefully lift and tilt out door
assembly from the unit and
set aside.
STEP 3:
Remove lock rail from
cabinet, requires removal of
four screws.
STEP 4:
Remove top hinge pin.
Remove top and bottom
hinge brackets from the unit.
STEP 5:
Remove hinge bushing from
bottom hinge bracket and
assemble to top hinge bracket.
STEP 6:
Taking care not to scratch the
surface, remove hole plugs from
the left hinge holes.
STEP 7:
Insert hole plugs into vacant right
hinge holes.
STEP 8:
Re-assemble hinge brackets to unit. Bottom right bracket
is assembled as the top left bracket. Top right bracket is
assembled as the bottom left bracket.
STEP 9:
Re-insert top hinge pin.
STEP 10:
Re-assemble lock rail from
STEP #3
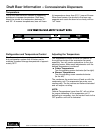
Operations to Perform on Door
STEP 11:
Remove bottom
door hinge bracket
from door assem-
bly and remove
door hinge bushing
from bracket.
Re-assemble door
hinge bracket to
previous position,
without bushing.
STEP 12:
Remove top door
hinge bracket from
door assembly and
assemble door
hinge bushing from
STEP 11 to bracket. Re-assemble door hinge bracket to
previous position with bushing attached.
STEP 13:
Door with full length SS handle:
There is no need to remove door handle. It will be
positioned correctly when door is reversed.
Door with SS pull tab or handle with wrap-
around bracket:
Remove the two screws mounting the handle and
reposition to appropriate location on the opposite
side of the door.
STEP 14:
Remove lock retainer and install on opposite end of door.
STEP 15:
What was the door top is now the door bottom. Carefully
lift the door onto the hinge brackets of the cabinet. The
two hinge bushings should meet. Reinsert the bottom
hinge pin to complete the door switching operation.
Step #12 Step #11 Step #13
Step #14
Step #6
Step #7
Remove
these screws
Top Hin
g
e Bracket
Bottom Hinge Bracket
Top Hinge Bracket
Bottom Hinge Bracket
Hin
g
e Bushin
g
65305-1
65189
65609-2
C31409-1
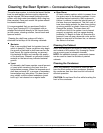
Not
Reversible
Handle Styles