Preparation
About Your Projector
ENGLISH - 15
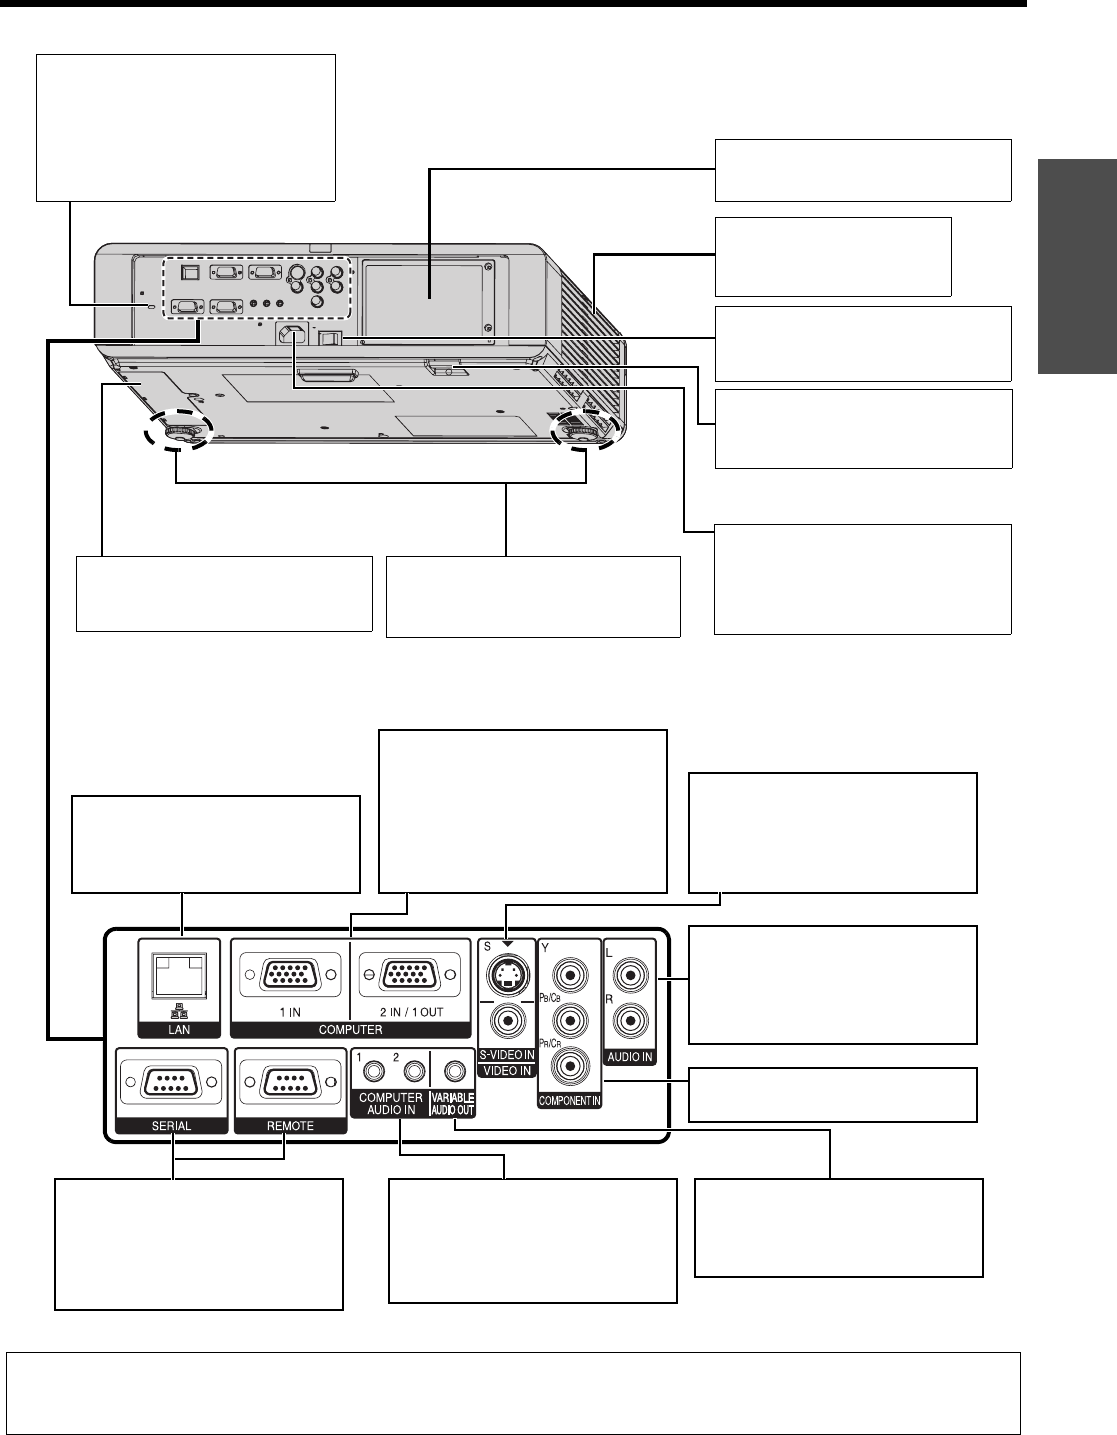
J Back and bottom view
NOTE:
• Do not cover the ventilation openings or place anything within 50 cm (20") of them as this may cause damage or injury.
• When a cable is connected to the VARIABLE AUDIO OUT, the built-in speaker will be disabled.
MAIN POWER
Switch the projector on/off.
(page 23)
ARF (Auto Rolling Filter)
compartment
(page 42)
Lamp unit compartment
(page 43)
Font leg adjusters
Screw up/down to adjust the
projection angle. (page 17)
Security lock
Attache the commercial shackle
lock, manufactured by Kensington,
to protect your projector.
Compatible with the Kensington
MicroSaver Security System.
LAN
Connect a LAN cable for network
connection. This terminal is
PT-F100NTE only
COMPUTER1 IN
Connect an RGB signal cable from
a computer.
COMPUTER2 IN/1 OUT
Connect an RGB signal cable from
a computer.
Selectable for input
and output by menu operation.
S-VIDEO IN
Connect a S-VIDEO signal cable.
VIDEO IN
Connect an RCA composite video
cable.
COMPUTER AUDIO IN
Connect audio cables for inputting
audio signals corresponding to
COMPUTER1 IN and/or
COMPUTER2 IN/1 OUT.
SERIAL
See “Serial terminal” on page 47.
REMOTE
See “REMOTE terminal” on
page 49.
COMPONENT IN
Connect a YPBPR signal cable.
AUDIO IN
Connect audio cables for inputting
audio signal corresponding to
VIDEO IN, S-VIDEO IN and
COMPONENT IN.
Air exhaust port
Heated air comes out of this
opening.
VARIABLE AUDIO OUT
Connect an audio cables for
outputting audio signals to the
connected equipment.
Burglar hook port
Attach a commercial burglar
prevention cable.
AC IN
Connect the Mains lead to supply
electronic power to the projector.
(page 22)


