ENGLISH
4
RFX9400 Starter’s Guide
Configuring the Extender
Note Before you start configuring the Extender, check if there are any firmware updates available in
the Downloads section on www.pronto.philips.com.
Refer to the chapter ‘Firmware Update’ on page 9 for further details.
Stand-alone Connection
To configure the Stand-alone Extender:
1 Plug in the Extender’s power adapter.
The Extender will start up. When start-up has finished, the Power and WiFi LEDs are green.
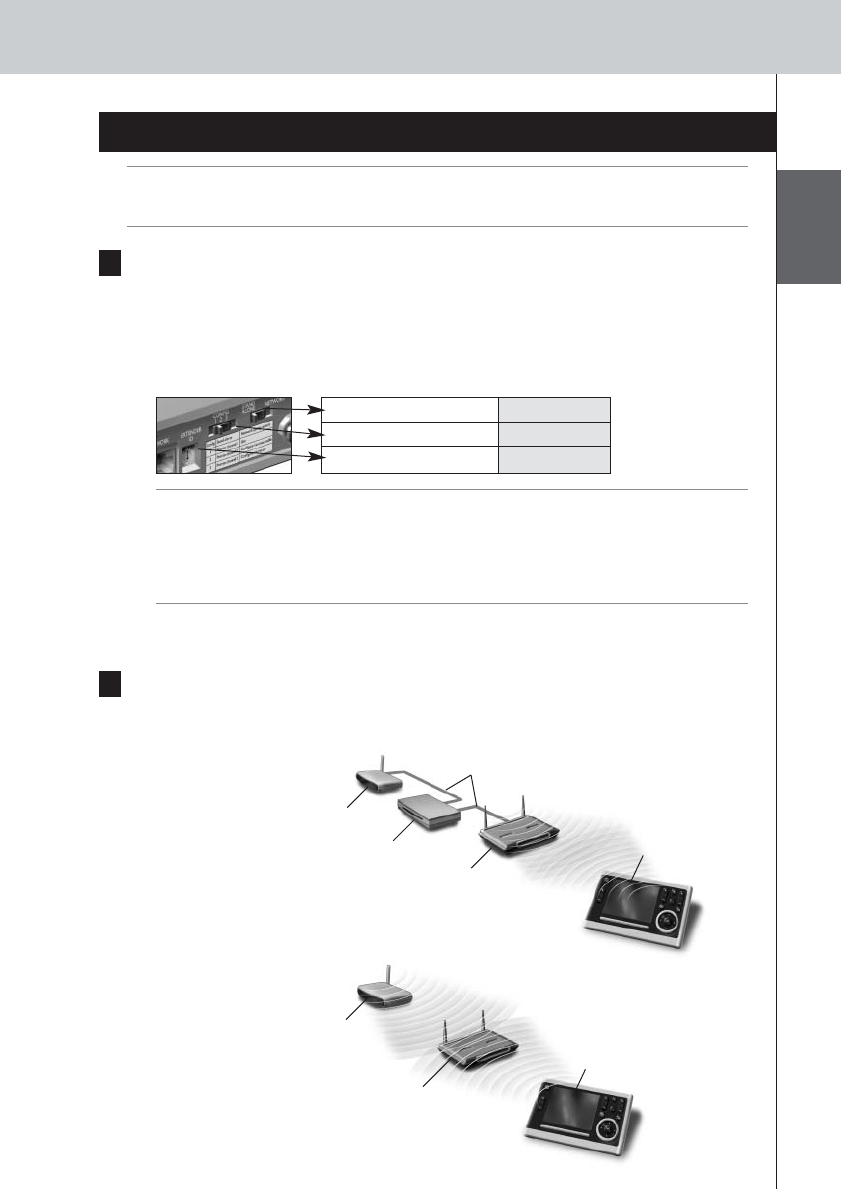
2 Use the default switch settings of the Extender:
Note • If there is already an Extender with ID 0, set the Extender ID switch to an ID that is not
used yet.
• If there is any interference with other products in or around the house, the
Configuration switch can be set to a different RF channel.
•Make sure the same Extender ID and RF channel are used on the Extender and the
Pronto Control Panel.
3 Configure the Control Panel’s configuration file so that the Control Panel can work
with the Extender. For more details, refer to the ProntoEdit Professional Online Help.
Network Connection
In the case of a network connection, the Extender is made part of the wireless Pronto Network.
There are two ways to use the Extender in a network:
• Wired connection
• Wireless connection
Stand-alone/Network Stand-alone
Configuration switch 1
Extender ID 0
Extender
Router
Wireless
Access Point
Straight Ethernet Cable
Extender
Wireless
Access Point
Control Panel
Control Panel
RFX9400_SG_ESF_v06.qxd 04-07-2006 08:12 Pagina 7


