Pico Technology USB Oscilloscope Installation Guide
DO115-7 3
1.5 Installing the PicoScope software and manual
1) Do not connect the oscilloscope to the PC yet!
2) Insert the Pico CD into your CD-ROM drive. It
should start automatically. (If it does not,
follow the steps on the right.)
3) Click the “Install Application Software”
button.
4) Follow the instructions on the screen to install
PicoScope.
5) Restart the PC.
6) 5000 Series only: Fit the appropriate plug
adaptor to the the power supply unit and plug
the unit into a mains socket. Plug the lead from the power supply unit into the
back of the oscilloscope. Switch on the mains power.
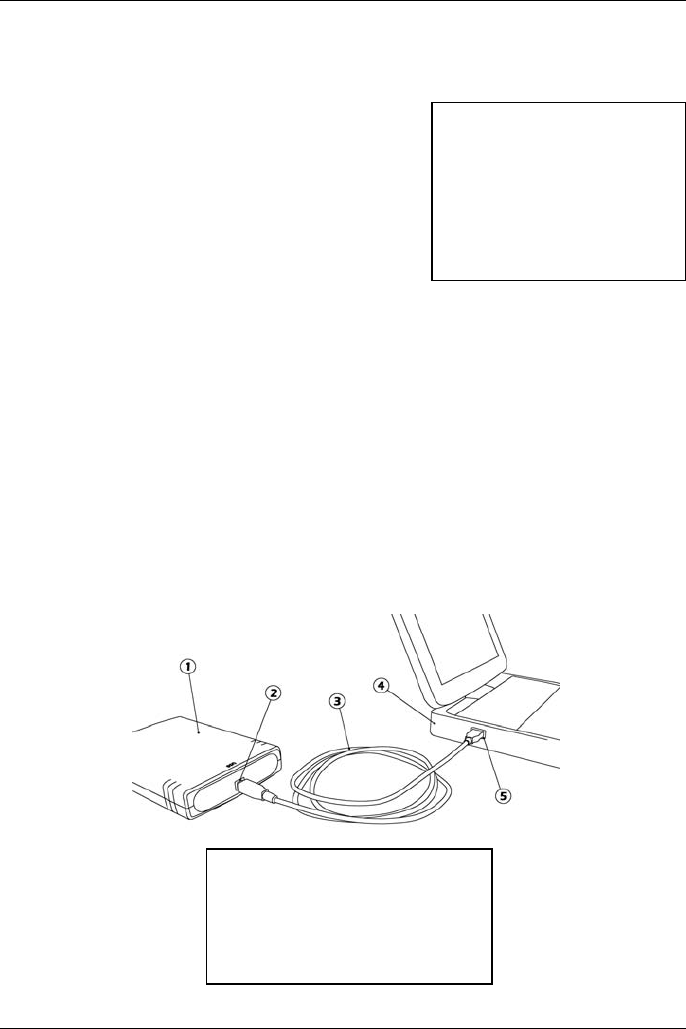
7) Connect the PC Oscilloscope to the PC (see connection drawing below). Ignore
any warnings that appear such as “This device can perform faster” or “USB2
device connected to USB1 hub”.
8) The “New Hardware Found Wizard” will run. Follow the instructions, and if the
wizard asks to connect to Windows Update, select “No”. If a warning about
Windows Logo testing appears, click “Continue Anyway”.
9) With some products, the “New Hardware Found Wizard” will run twice. If this
happens, repeat the previous step.
10) Click the Windows Start button, go to “Programs” and then “Pico Technology”,
then select “PicoScope” to begin using the PC Oscilloscope.
11) If an oscilloscope probe is connected to the oscilloscope, you should see a
small 50 Hz or 60 Hz mains signal in the oscilloscope window when you touch
the probe tip with your finger.
Key:
1) PicoScope PC Oscilloscope
2) PicoScope’s USB port
3) USB cable
4) PC
5) PC’s USB port
To start the CD manually:
1) Click the Windows
Start button and select
“Run...”
2) Type d:\pico (where
‘d:’ is your CD-ROM
drive)
3) Press the Enter key


