


Appendix D: Touch Screen (optional)
CMOS Configuration
If your Clean Screen II has the optional touch screen installed you will need to enter into
CMOS Setup (press <F2>) and configure COM3. The touch screen is physically attached to
COM3.
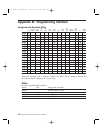
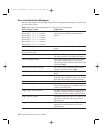
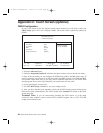
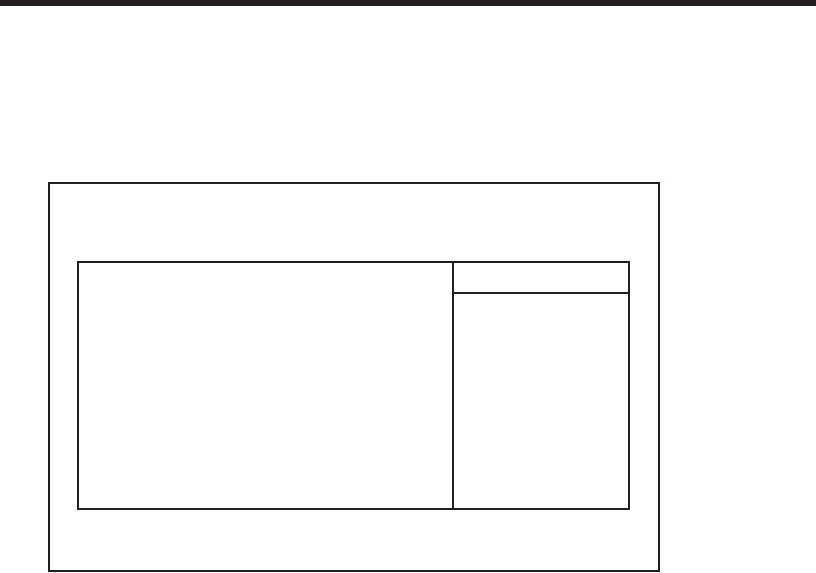
Figure D.1 — Integrated Peripherals sub-menu.
1. Select the Advanced menu.
2. Select the Integrated Peripherals sub-menu and press <enter> to move into the sub-menu.
3. Once in the sub-menu you can configure the COM3 base address and IRQ. Select Auto. If
enable is selected, you will need to set the base address and IRQ. In most cases 3E8H and IRQ7
are available. Write these down as you may need to reference them later as you run the ELO
install program. Do not select OS controlled, your touch screen will not work.
4. Exit by pressing the <escape> key.
5. Exit the CMOS Setup, remember to save your settings on exit.
6. After you have installed your operating system run the ELO install program following the
ELO touch screen documentation. This can be found in the !read.me! file stored on the touch
screen setup disk.
Technical Note: If you are unsuccessful installing the ELO drivers or if the touch
screen has other problems, please contact ELO’s technical support line at (423) 220-4299
or http:\\www.elotouch.com.
46 Planar Clean Screen II PC User’s Manual
PhoenixBIOS Setup Utility
I/O Device Configuration
Local Bus IDE Adapter: [Primary]
Serial Port A: [Auto]
Serial Port B: [Auto]
Mode: [Normal]
Serial Port C: [Auto]
Floppy Disk Controller: [Enabled]
Item Specific Help
Enable the integrated
local bus IDE adapter
F1 Help ↑↓ Select Item -/+ Change Values F9 Set Defaults
ESC Exit ↔ Select Menu Enter Select
ᮣ
Sub-Menu F10 Save and Exit
CS II Manual LAYOUT#2304 3/25/99 11:16 AM Page 46