


Chapter 1: Connections and Setup
6
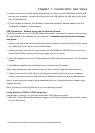
Wall Mounting
The number of the screw: 2 pcs
Direction for wall mounting: LED panel upward.
Dimension for the screw: TBD
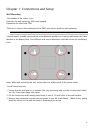
There are 4 slots on the underside of the EMTA that can be used for wall mounting.
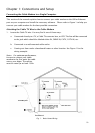
Note: When wall mounting the unit, ensure that it is within reach of the power outlet.
You will need 2 suitable screws which screw diameter would be 4.4 mm to wall mount the Cable
Modem or the Battery Pack. Two different wall mount directions could be chosen for the Battery
Pack.
Note: When wall mounting the unit, ensure that it is within reach of the power outlet.
To wall mount the unit:
1. Ensure that the wall you use is smooth, flat, dry and sturdy and use the 4 screw holes which
are 101.6 mm apart from each other.
2. Fix the screws into wall, leaving their heads 3 mm (0.12 inch) clear of the wall surface.
3. Remove any connections to the unit and locate it over the screw heads. When in line, gently
push the unit on to the wall and move it downwards to secure.