10
6. Setting The Dip Switches
6-1. Setting the Dip Switches
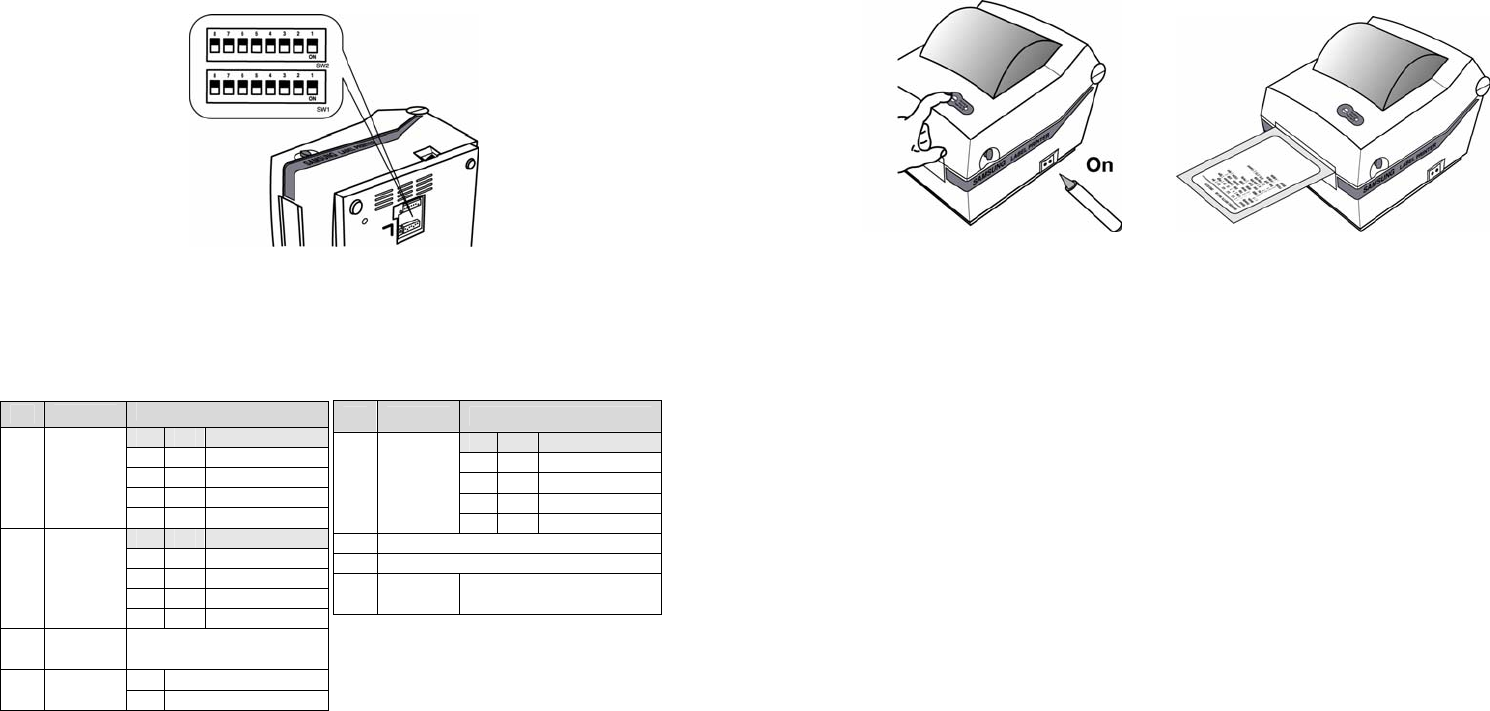
The Dip Switches are located on the bottom of the printer. The Dip Switches are used to
set the Printer to perform various functions. Follow these steps when changing Dip
Switches setting :
1. Turn the printer power switch off.
2. Remove the screw on the bottom of the printer and open the bracket.
3. Flip the Dip Switches using tweezers or another narrow-ended tool. Switches are
off when up and on when down in the Figure below.
4. The new setting takes effect when you turn on the printer.
Note : Always change Dip Switch settings only when the printer is turned off.
6-2. Functions of Dip Switches
6-2-1. Dip S/W 1 6-2-2. Dip S/W 2
NO Functions
Details
2 1 Speed
Off Off 2.5 ips
Off On 3.0 ips
On Off 4.0 ips
1,2
Speed
Selection
On On 5.0 ips
4 3 Density
Off Off 0(Low)
Off On 7
On Off 13
3,4
Density
Selection
On On 20(High)
5,6,
7
Developer
Mode
Default --- off
Off Move to Cutting Position
8
Position
Selection
On Move to top of next page
No Functions Details
2 1 Baud Rate
Off Off 9,600 bps
Off On 19,200 bps
On Off 57,600 bps
1,2
Baud
Rate
On On 115,200 bps
3 Reserved
4 Reserved
5~8
Developer
Mode
Default --- off
11
7
. The Self Test
The self-test checks whether the printer has any problems. (You cannot perform this
procedure if using the printer’s label peel-off option) If the printer does not function
properly, contact your dealer. The self-test checks the following;
1. Make sure that paper roll has been installed properly.
2. Turn on the power while holding(2sec) down the FEED button. The self-test begins.
3. The self-test prints the current printer status, which provides the control ROM version
and the DIP switch setting.
Cleaning Head※
Paper dust on the heating elements may lower the printer quality. In this case, clean the
print head as follows :
Cautions
1. Turn Off the printer power before cleaning.
2. Note that the thermal head becomes very hot during normal operation,
creating the danger of burn injury. Be sure to wait for about 10 minutes
after turning printer power off before beginning the cleaning.
1. Open the printer cover.
2. Clean the thermal element (the area which is marked a thin black line) of the
thermal head with a cotton swab moistened with a alcohol solvent (ethanol,
methanol, or IPA).
3. After confirming that the alcohol solvent has been dried up completely,
close the cover-open.
Note 1. Never touch the thermal element with your hand,
then the thermal element can be damaged.
2. Don’t scratch the printer head.
